Download and Install from Salesforce AppExchange
Make sure you are logged into your Salesforce Org where you wish to install JunoOrders.
NOTE: You will want to confirm that you have the Salesforce Quote object enabled for your org. Click the next step on the right to receive instructions on how to Enable Salesforce Quote Object.
Open a new browser tab and visit the Salesforce App Exchange Juno Orders application listing.
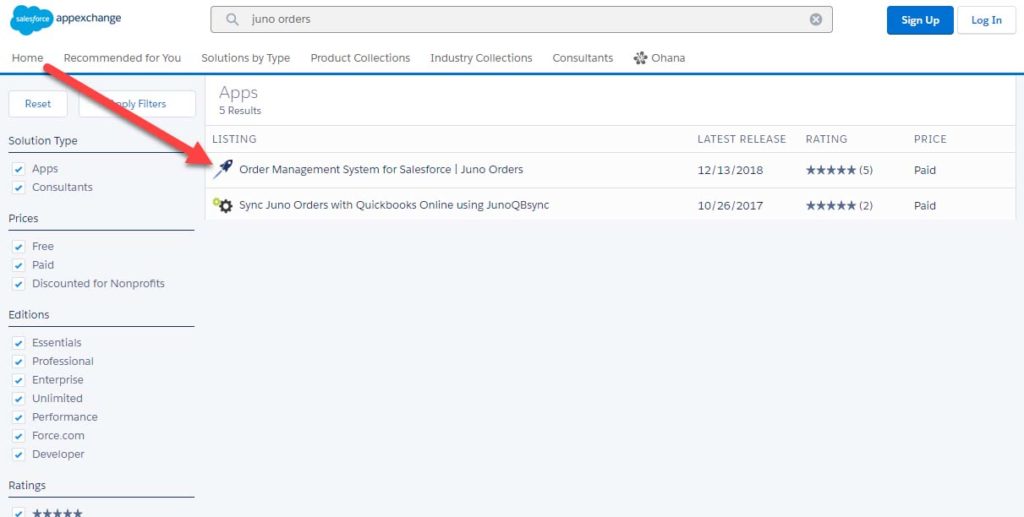
Click the Green “Get It Now” button in the upper right corner of the screen.

You will be prompted to add a payment method for use once the trial period expires. You will not be billed until after the trial period ends. Cancelling your subscription is easy. Subscriptions only run month-to-month, so you are never locked into a long term contract.

For most organizations, the “Install for All Users” option will work best. If you are unsure, you may wish to consult your Salesforce Administrator for guidance.
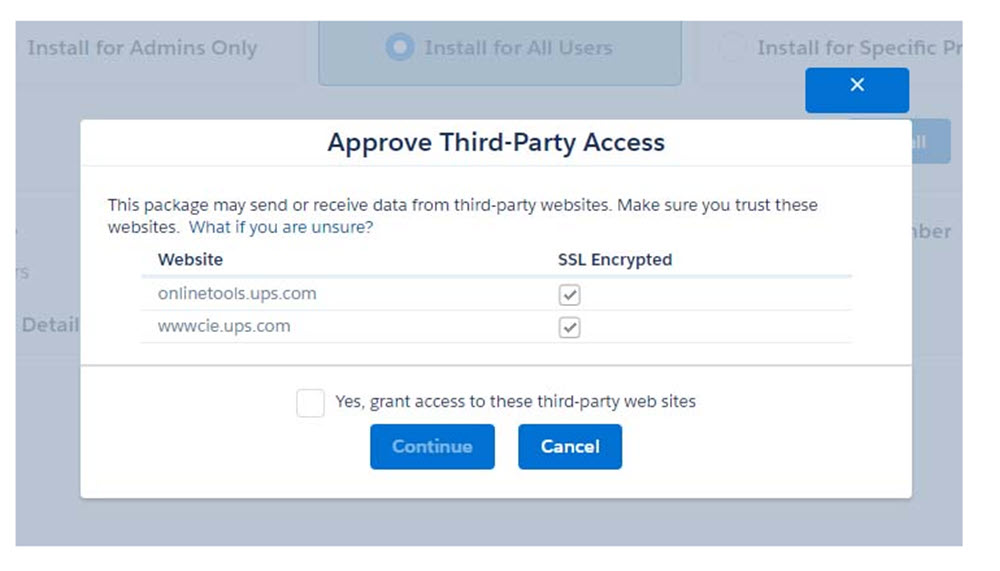
Juno Orders has additional features available from outside shipping and account vendors you will recognize. Please grant access to these providers.
Juno Orders will install. If you do not have the Salesforce Quote Object enabled in your Org, the install will fail. To enable Salesforce Quotes, please follow these steps.
Enable Salesforce Quote Object
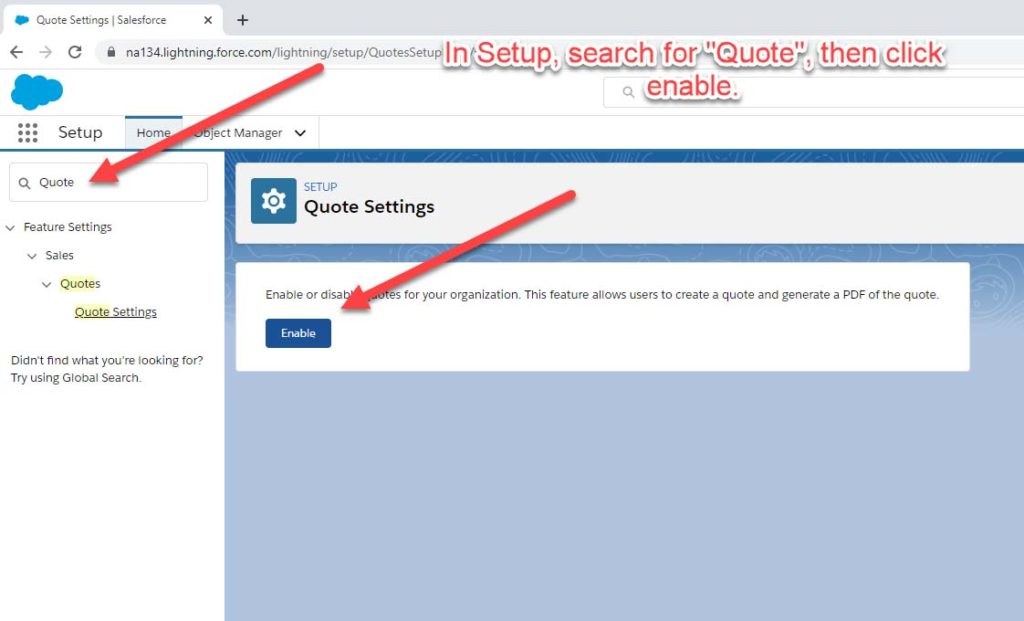
In Salesforce Setup,
Search for Quote
Click on Enable.
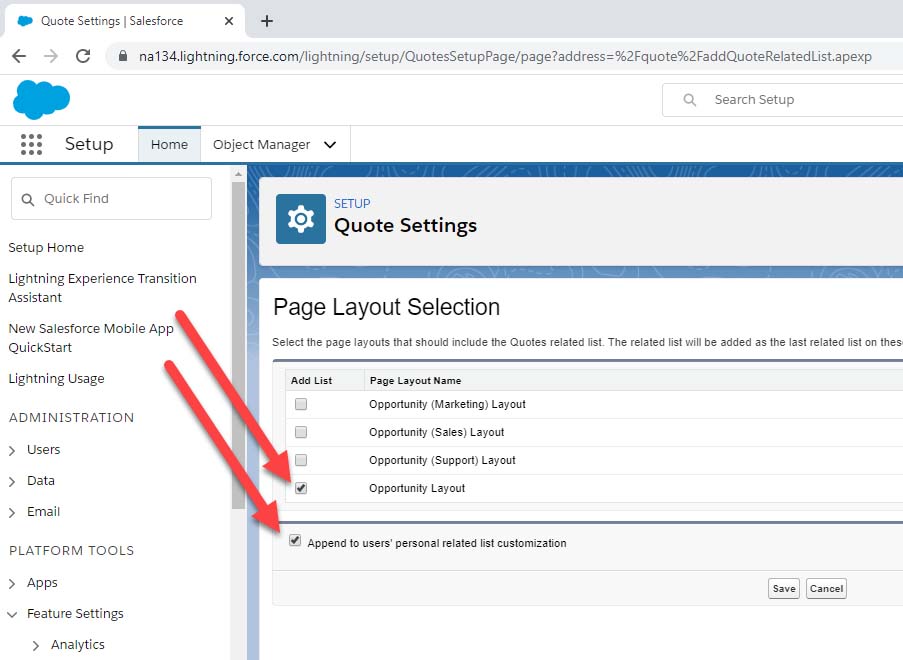
Select the layout(s) you wish to use Quotes with, along with “Append to users personal related list customization” and hit Save.
At this point, you can return to the installation and complete the Install.
Switching to Juno Orders In Salesforce Lightning
To get the setup Page In Juno Orders Lightning.
Click on the Setup wheel
Go to “Setup”.
Select Apps
Click on Packaging
Under Packages Select Installed Package.
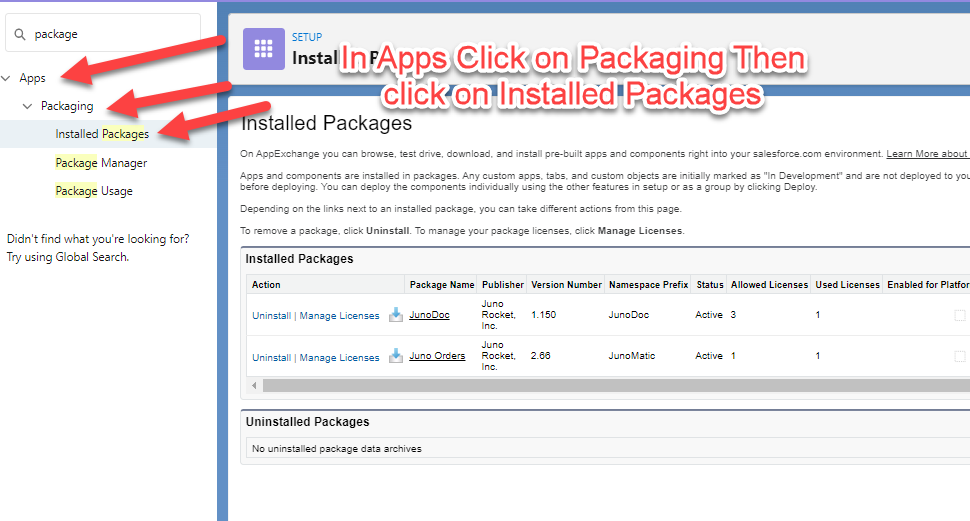
Right here you can see the Juno Orders had been set up as a path and allowed as a single user license. in case you want to increase the license just email us.
- Click the App Launcher.
- Click on Juno Orders Lightning for Demo. You can see different Salesforce Standard Objects and some Objects are unique to Juno Orders.
- Now you entered into Juno Orders Lightning.
Adding Fields to the Account Page Layout
To set up an Object Page Layout for adding fields, Follow these steps,
- Click on the “App Launcher”.
- Locate “Juno Orders Lightning” in the App Launcher.
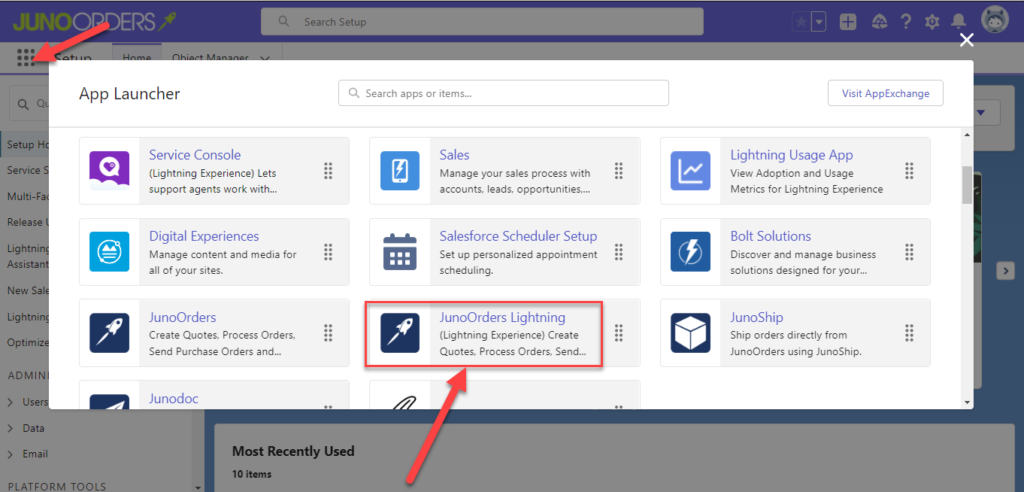
You can see different Salesforce Standard Objects and some Objects are unique to Juno Orders.
Now we can start editing these Standard Objects for Page Layout and Adding Fields. Follow these steps. .
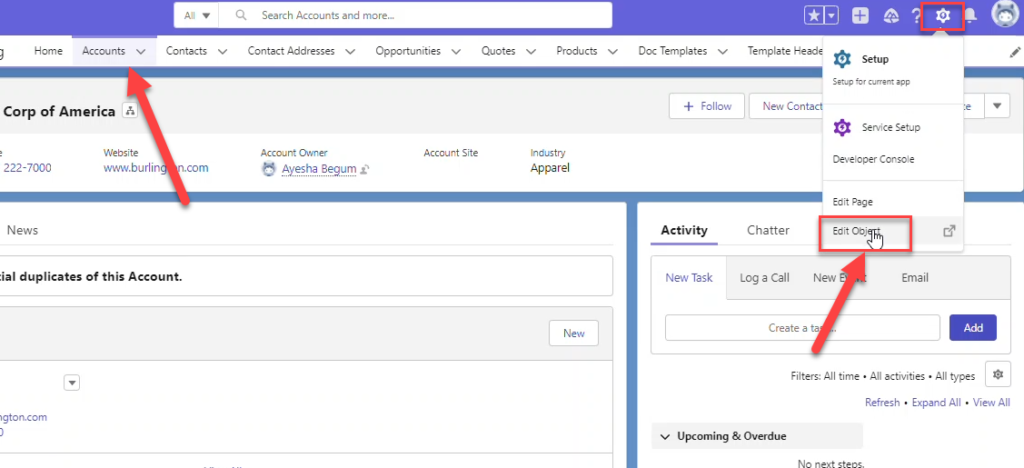
- Click on Account Object. Select A record.
- Click on the Setup wheel in the right corner of the page layout
- Select Edit Object.
Now look for Page Layout in Account Object and Click on Page Layout Assignment.
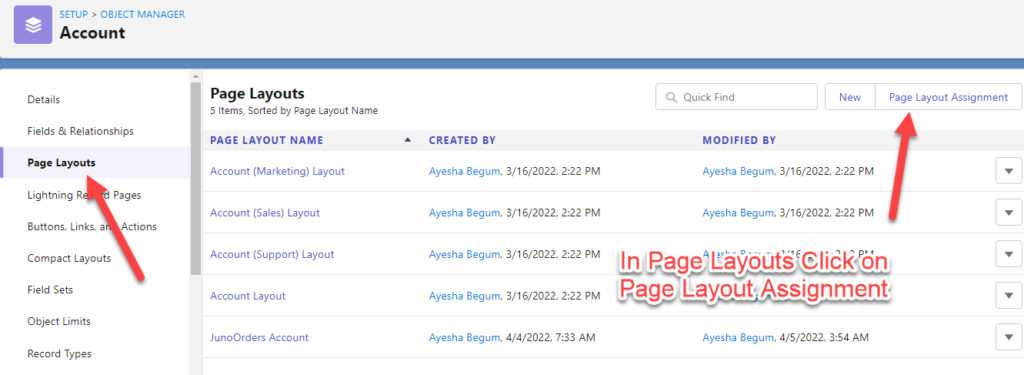
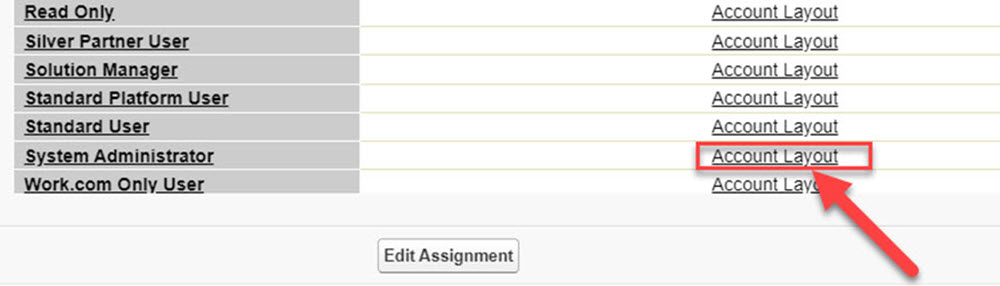
Here for different Profiles we are having a different Page Layout
Click on System Administrator Account Layout.
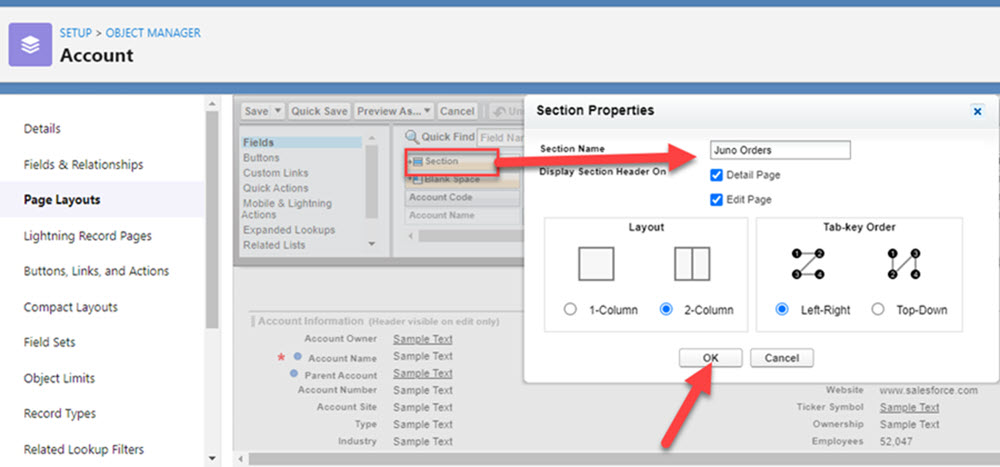
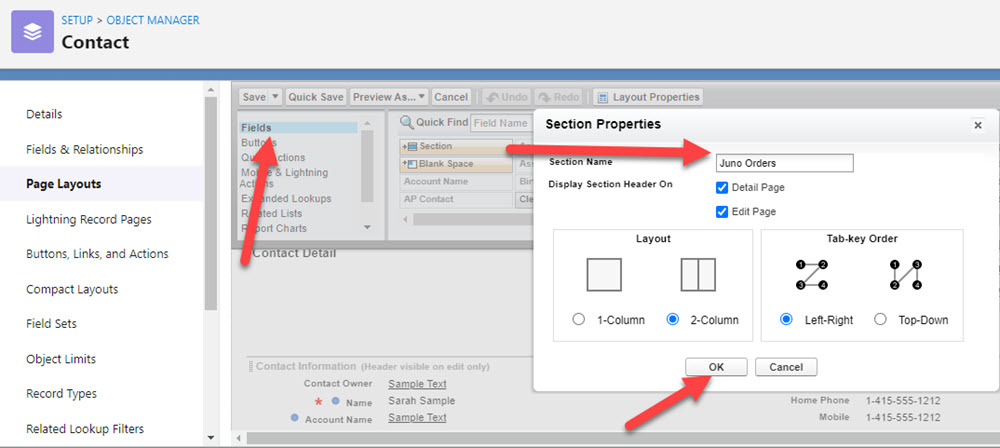
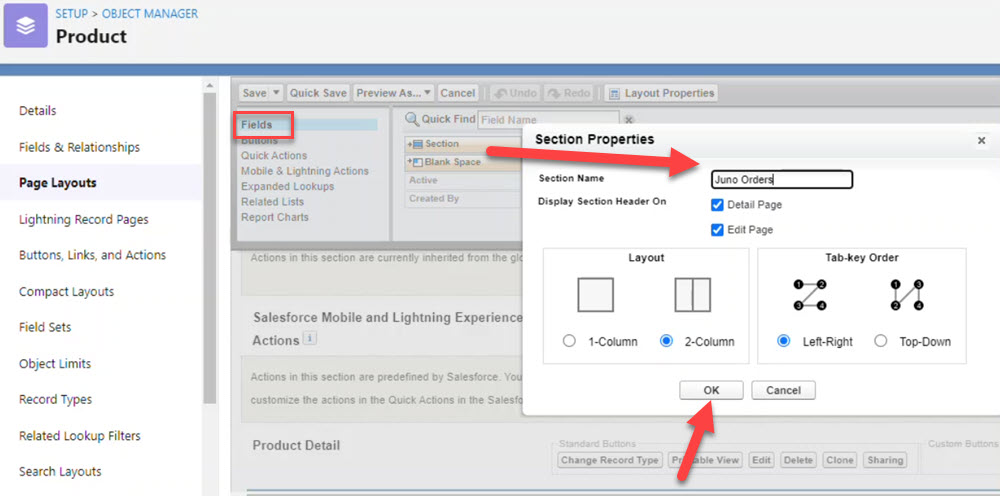
Now, we can edit the Account page layout. Create a section break and Name it Juno Orders. With the help of dragging and dropping the section field anywhere you wish.
Create a section referred to as Juno Orders.
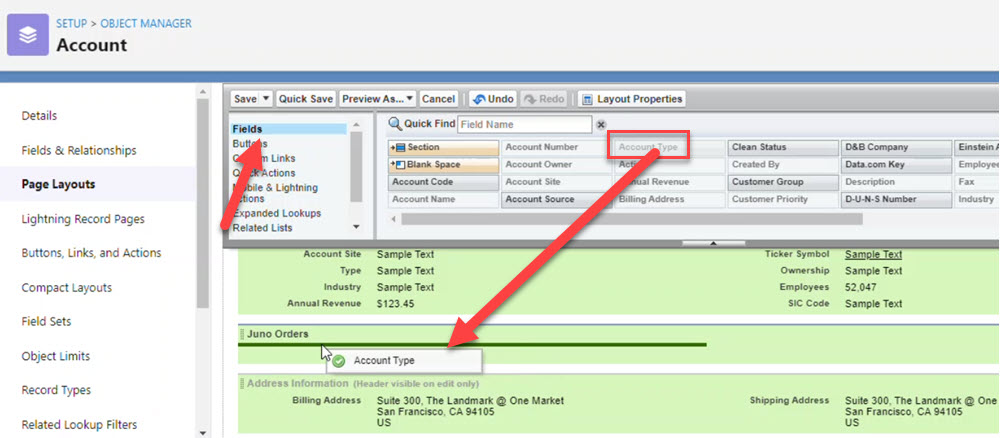
Now, Add the Account type field under the Juno Orders.
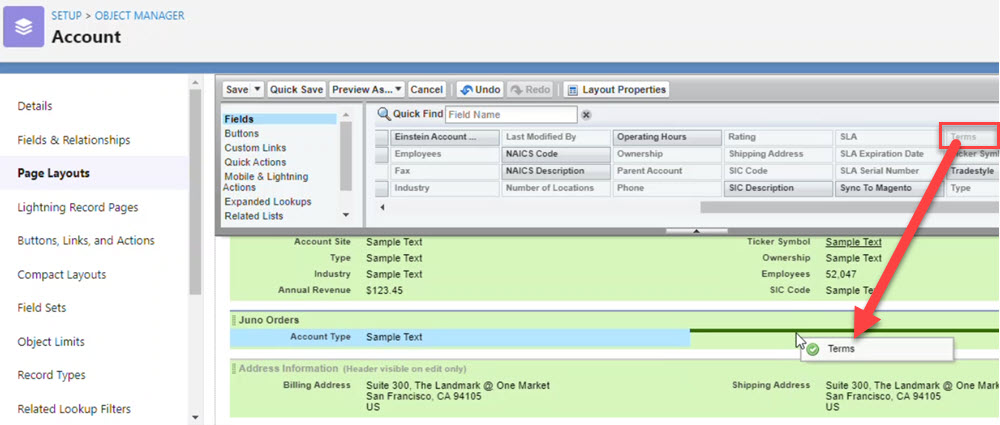
Now, Add the Terms field under the Created Juno Orders.
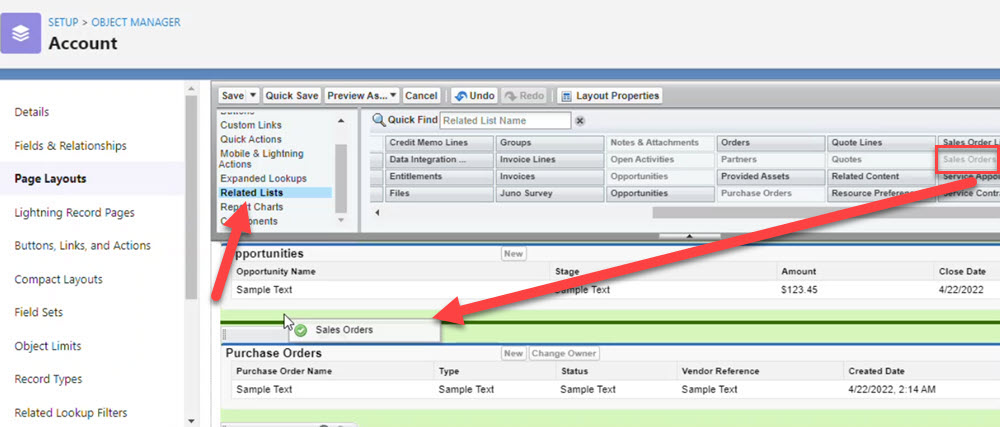
Next you will Scroll down to the Related list Section and Add the following related list to the Account Page Layout.
Add Sales order under Related list.
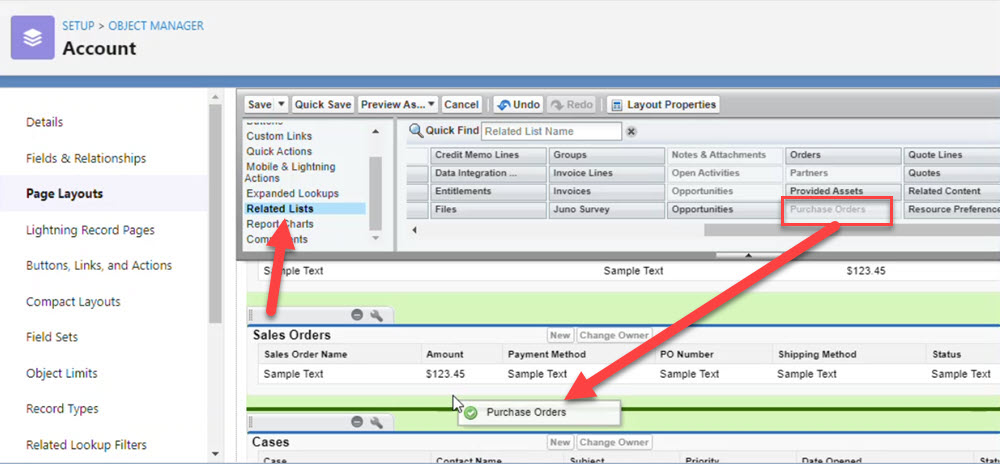
Add Purchase Order under the Related list.
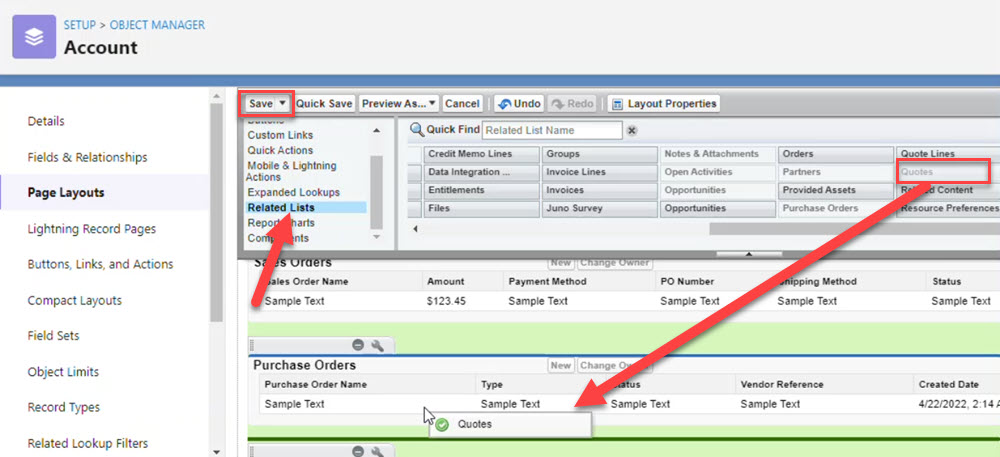
Add Quotes under the Related list.
Click Save.
When you go back to the Lightning view of Account Object you could see the added fields like Sales Order, Purchase Order, and Quotes rates on Related.
When you click on Details you could see “Juno Orders” which we added in the Page Layout Section.
Contact Page Layout
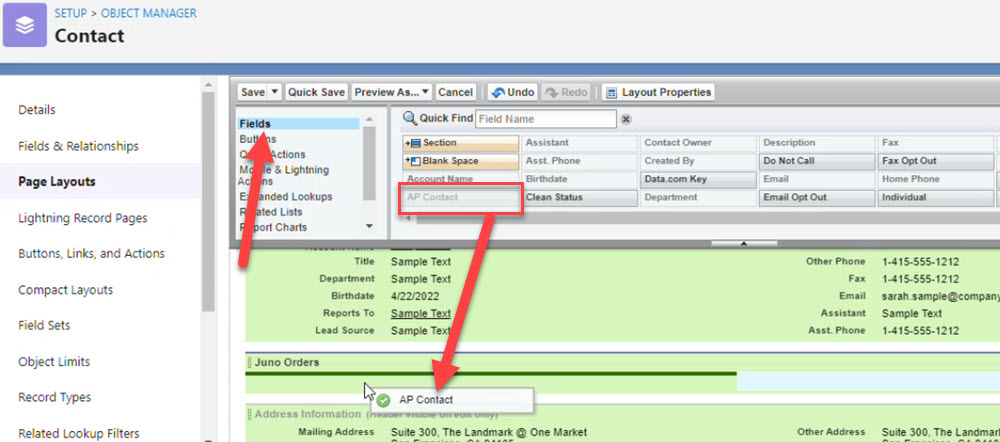
Continuing the setup for preferred Standard Salesforce Objects for Juno Orders. Now move on to Contact Object. Repeat the same process to Edit the object and in Page Layout create a section break in Contact Page Layout.
The created section is referred to as Juno Orders.
Now, Add the AP Contact fields under the Juno Orders.
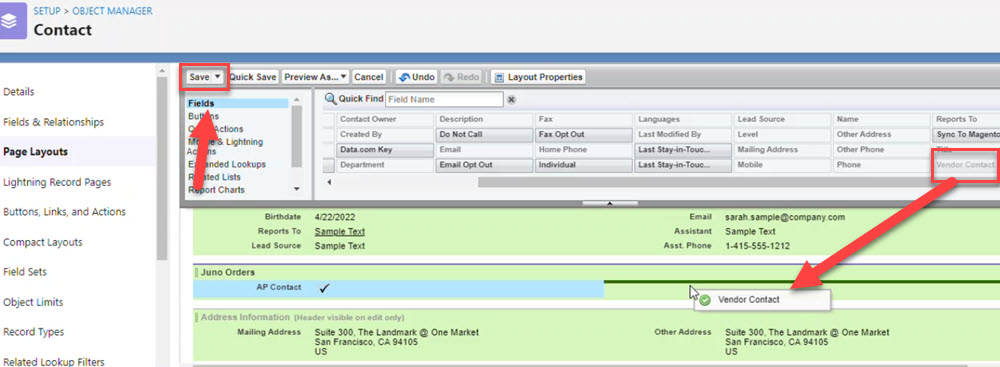
Now, Add the Vendor fields under the Juno Orders.
Next, Select the Button Field and Add the following Button to the Page Layout.
- Create Contact Address.

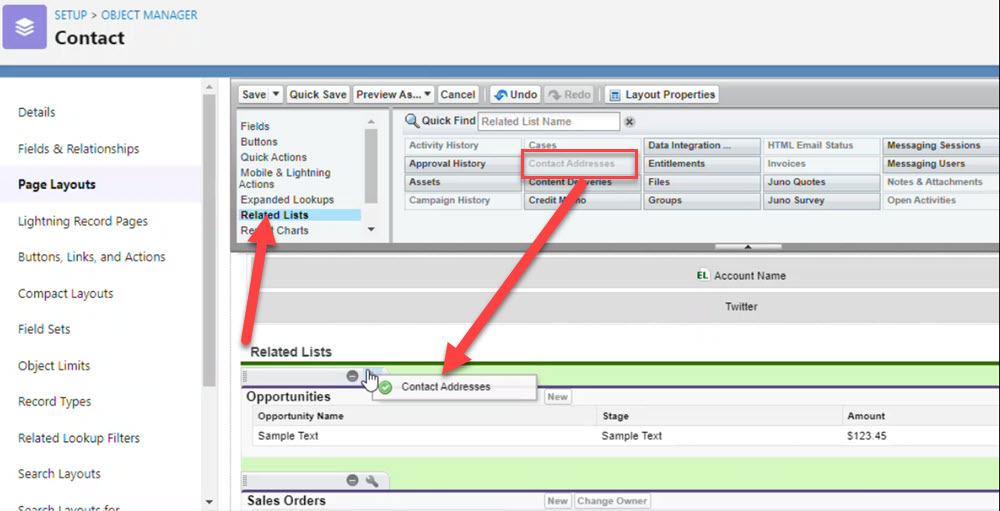
Last, you Scroll down to the Related list Field and add the following related list to Contact Page Layout.
Contact Addresses
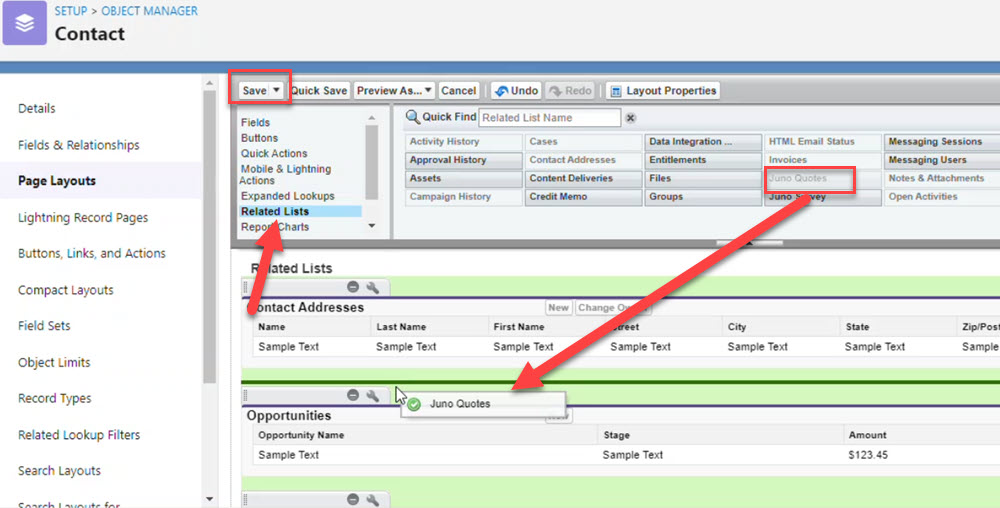
Juno Quotes.
Click Save.
When you go back to the Lightning view of Contact Object you could see the added fields like Create Contact Address, Contact Addresses, Juno Quotes rates on Related.
When you click on Details you could see “Juno Orders” which we added in the page Layout Section.
Product Page Layout
Continuing the setup for preferred Standard Salesforce Objects for Juno Orders. Now move on to the Product Object. Repeat the same process to edit the Object and Page Layout.
You will likely want to add the following fields to the Product Page Layout. You can also create a Section break as done previously.
Create a section referred to as Juno Orders.
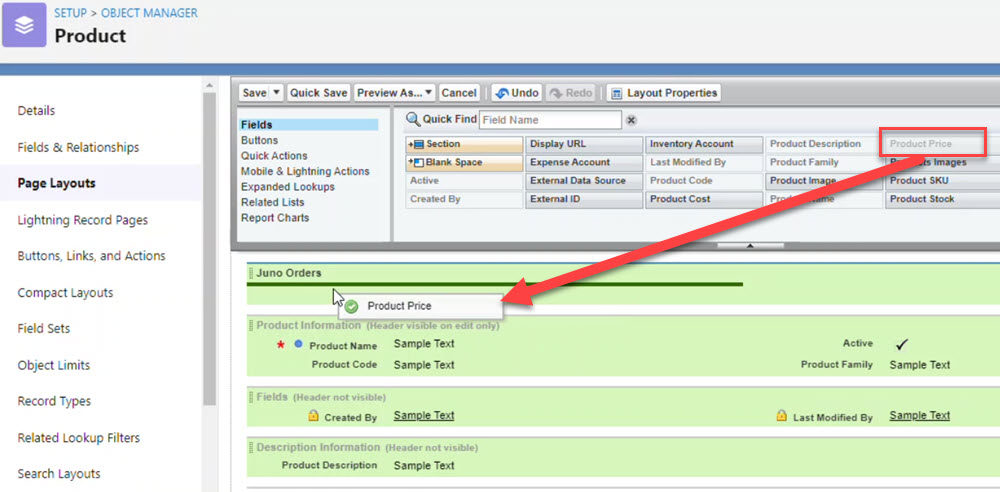
- Add the Product Price field under the Juno Orders.
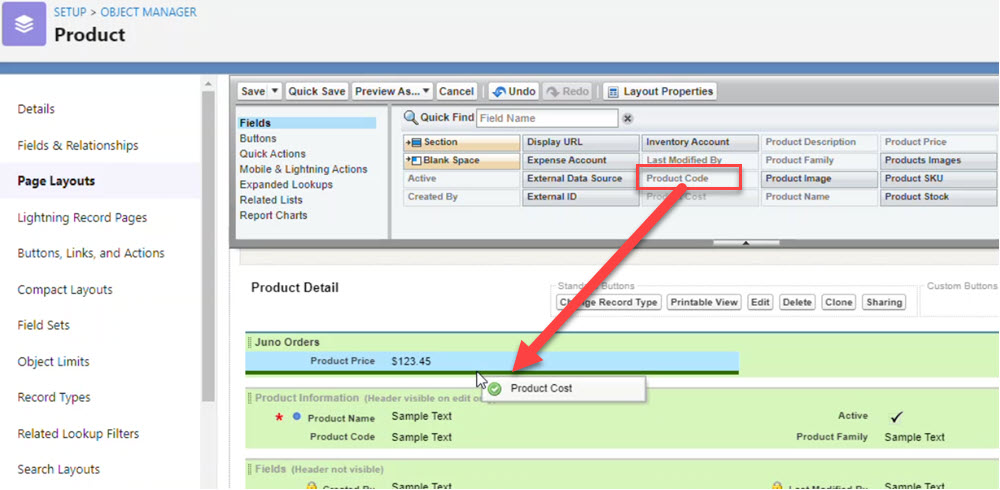
- Add the Product Cost Field under the Juno Orders.
- Add the Product Type Field under the Juno Orders.
- Click Save.

When you go back to the Lightning view of “Product Object” you could see the added fields on related. When you click on Details you could see “Juno Orders” which we added in the Page Layout Section.
PDF & Email Templates
Juno Orders comes with a setup of PDF Template and Email Template for all of the Objects. Steps to follow these Templates are,
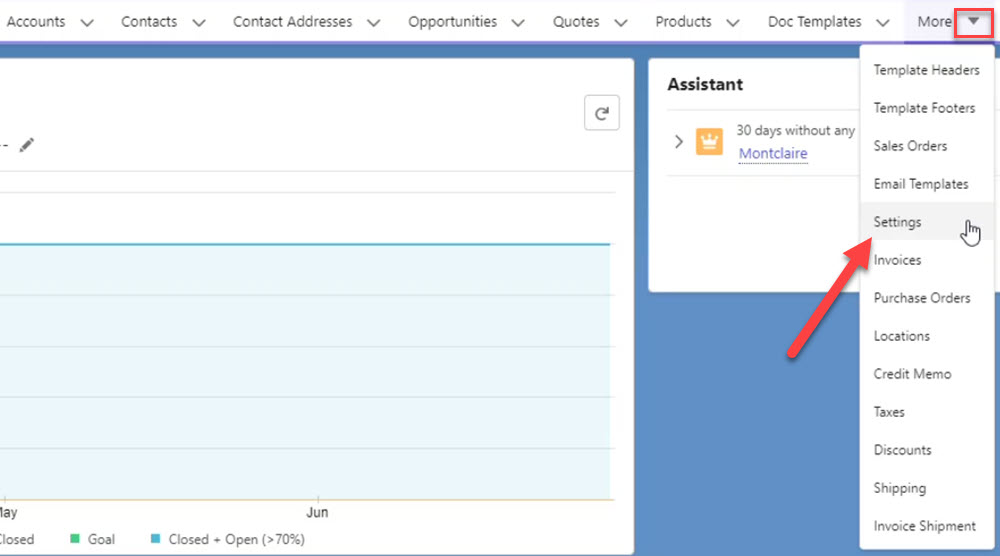
Click on More.
Click on Settings.
You will see every Object is having a default both Pdf templates and Email Templates.
Click on Quote Object for Pdf Template.
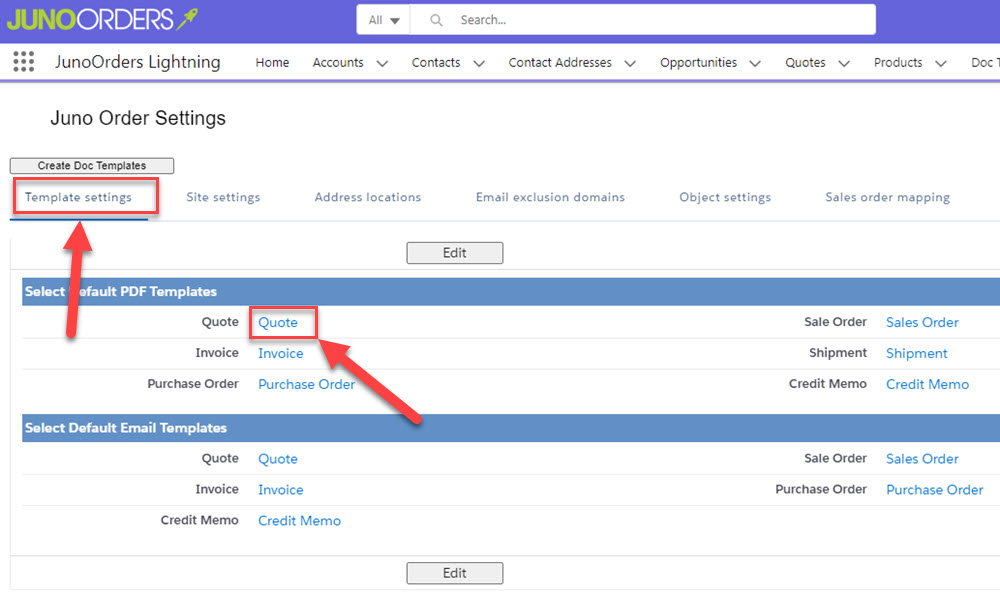
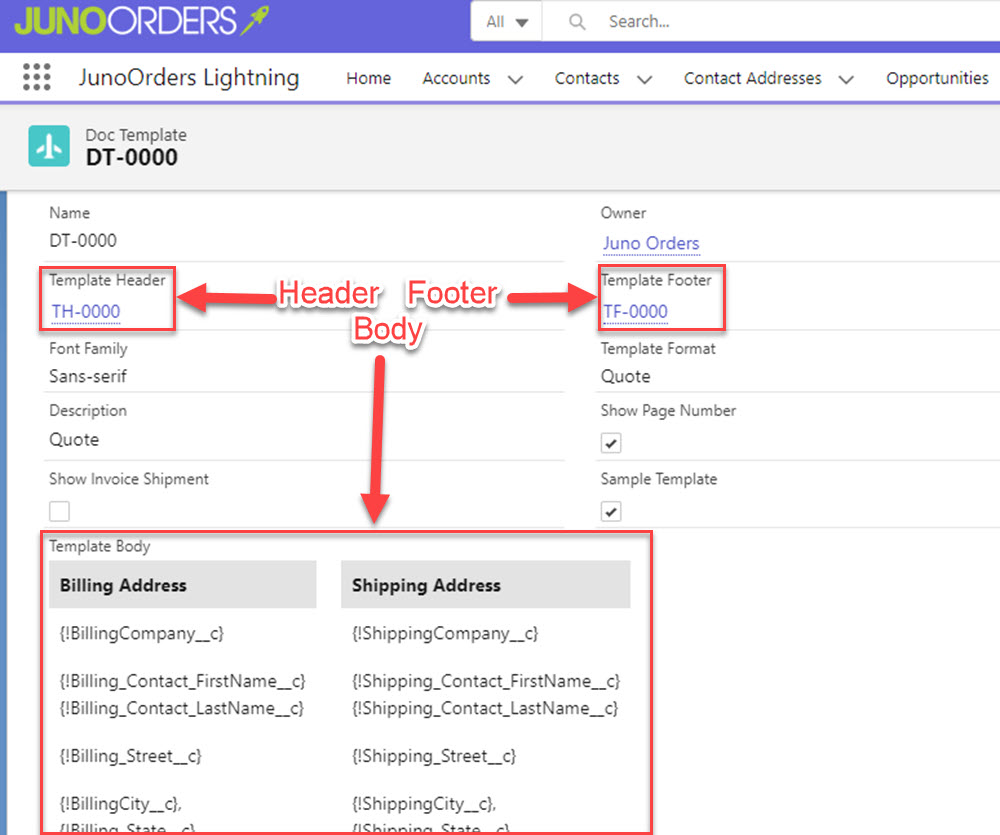
You will see three parts of the Template.
- Body
- Header
- Footer
The above video demonstrates how to view and manipulate the included templates for Juno Orders.
Branding with Your Logo
In Juno Orders Lightning
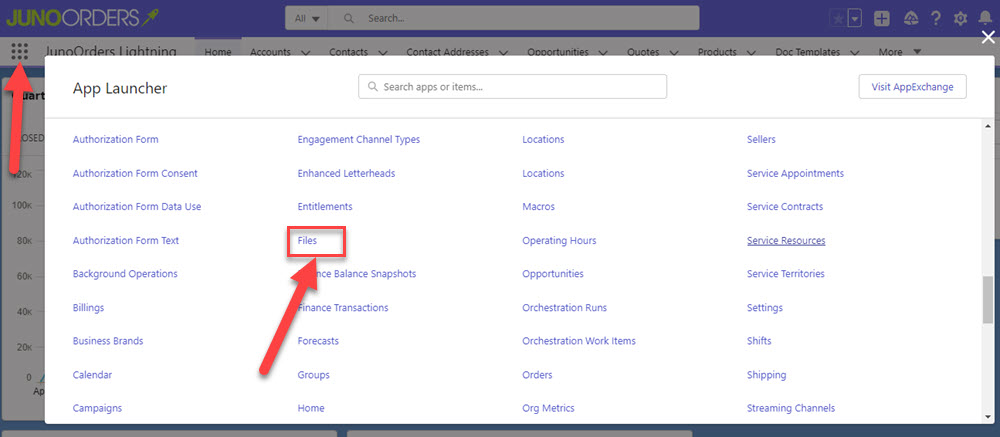
- Click on App Launcher Search for Files.
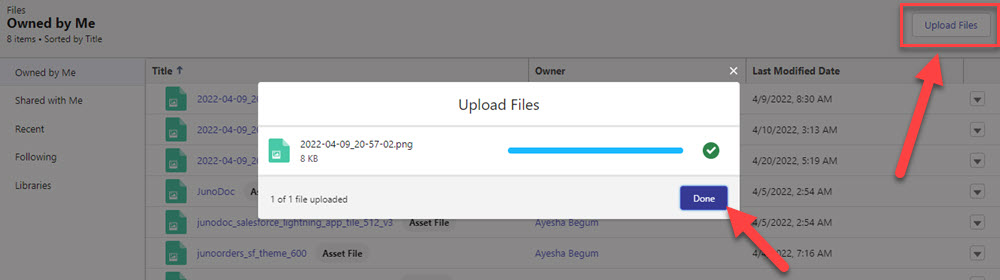
You can upload your logo under Upload Button.
We recommend not exceeding 100px High or 300px Wide, though the space is there and the choice is yours.
Right click on the uploaded pic and Copy the image address.
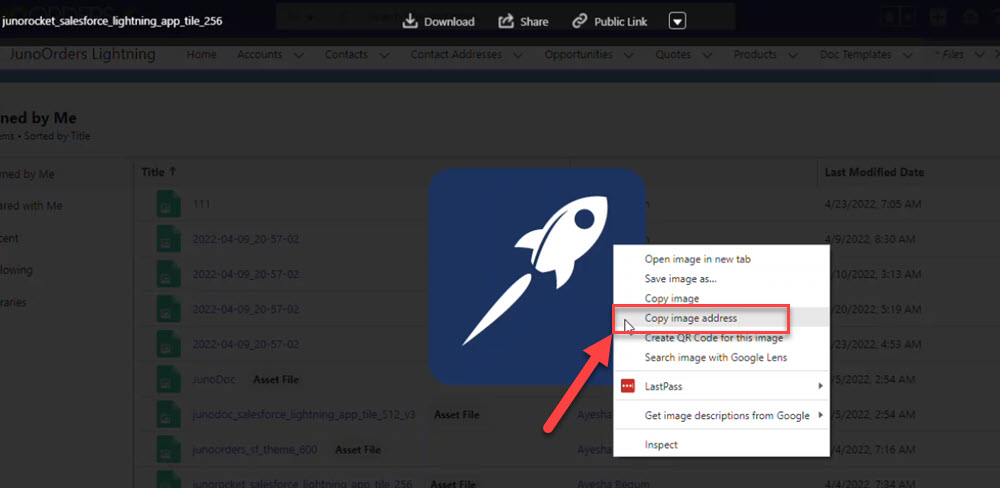
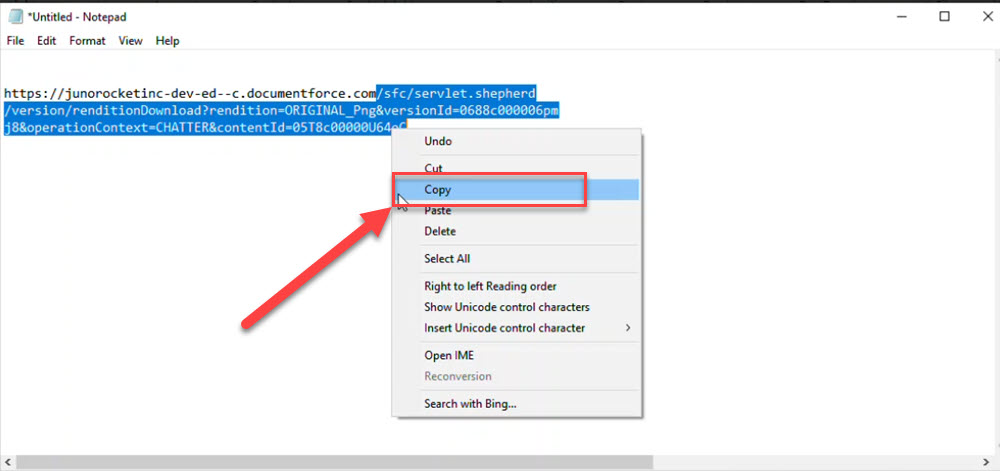
- Past that URL in a new text document.
- After that we need to copy everything next to .com (for example https://support.junorocket.com/knowledge-base in this link we need to copy the URL from /Knowledge-base.)
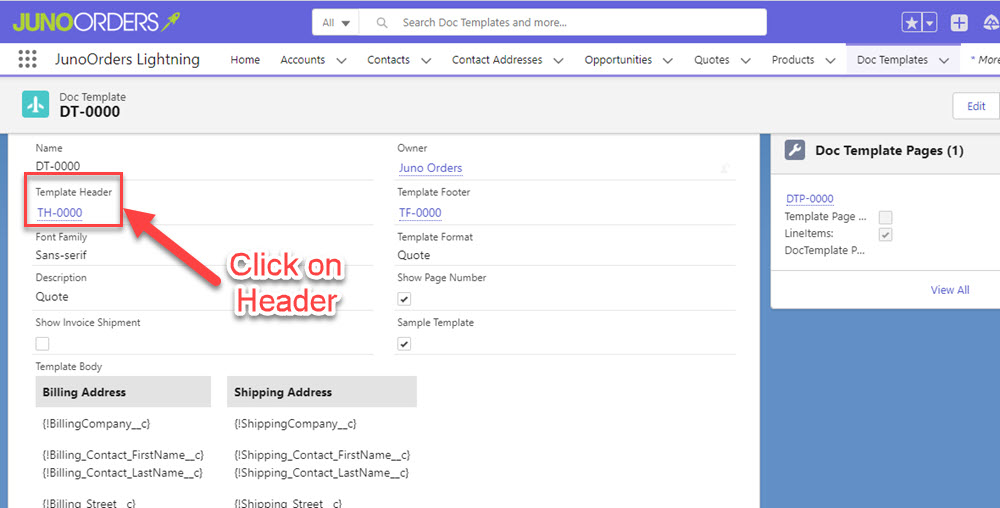
Within the Doc, Template object select the Quote record.
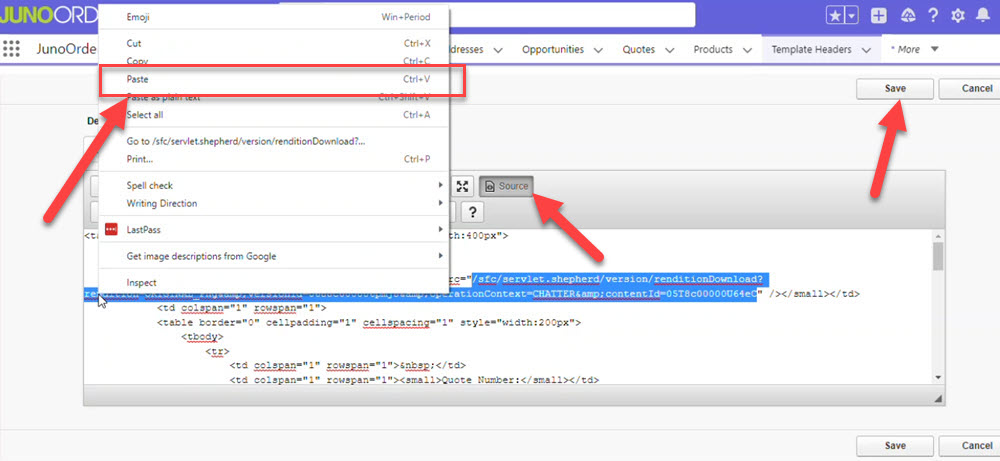
Click on Header.
Click on the Edit button.
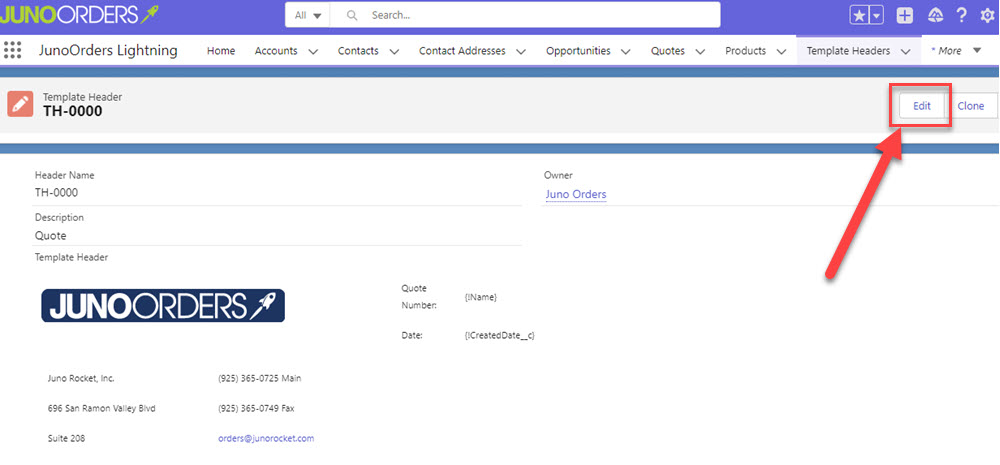
Click on Source code and simply replace the URL with the image URL.
Now the logo is changed according to your preference.
Click on Save.
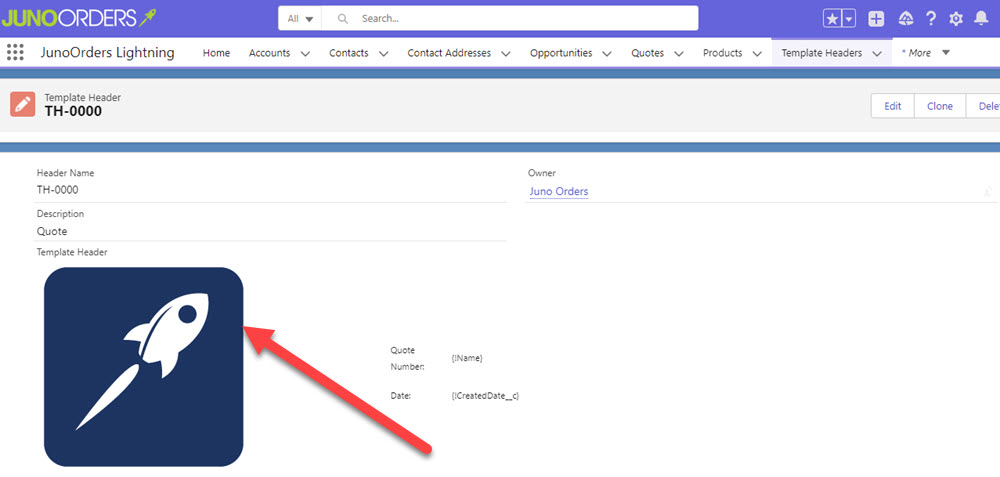
You could see the brand is modified.
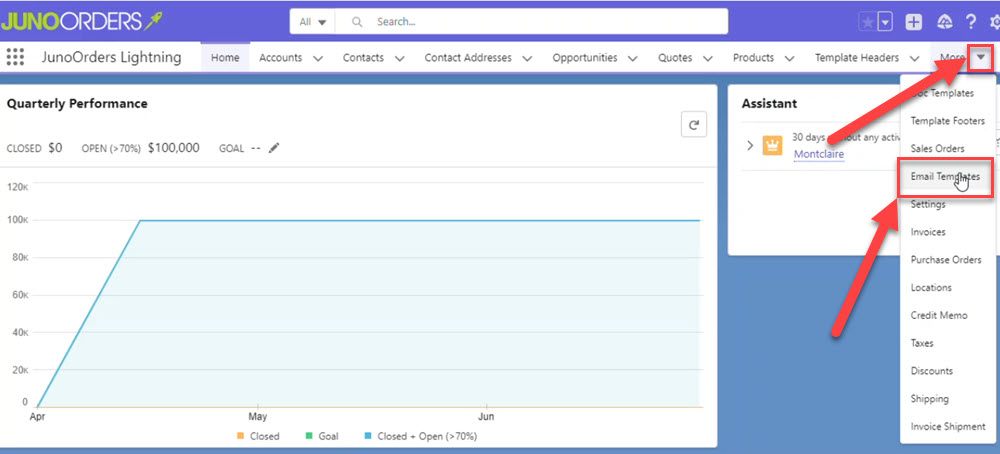
Managing Email Templates
In Juno order lightning page,
click on Email Template.
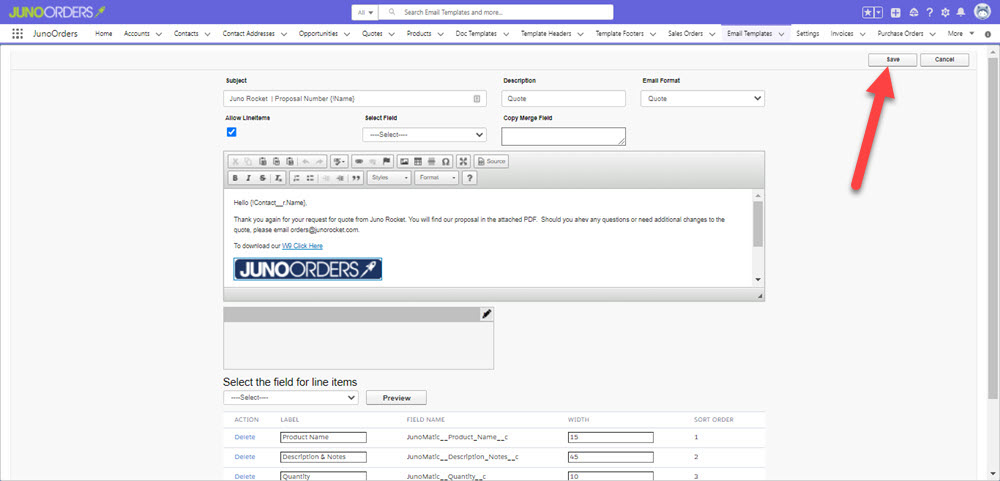
- Click on at the Quote record.
- Click on Edit.
- You can make changes accordingly
Creating Locations
The Address Location feature allows you to predefined locations for order deliveries on your business. Your business might also have one location or many locations. This is the place where you can create each location and then use these location addresses when creating Purchase Orders. Steps to follow
Click on Locations.
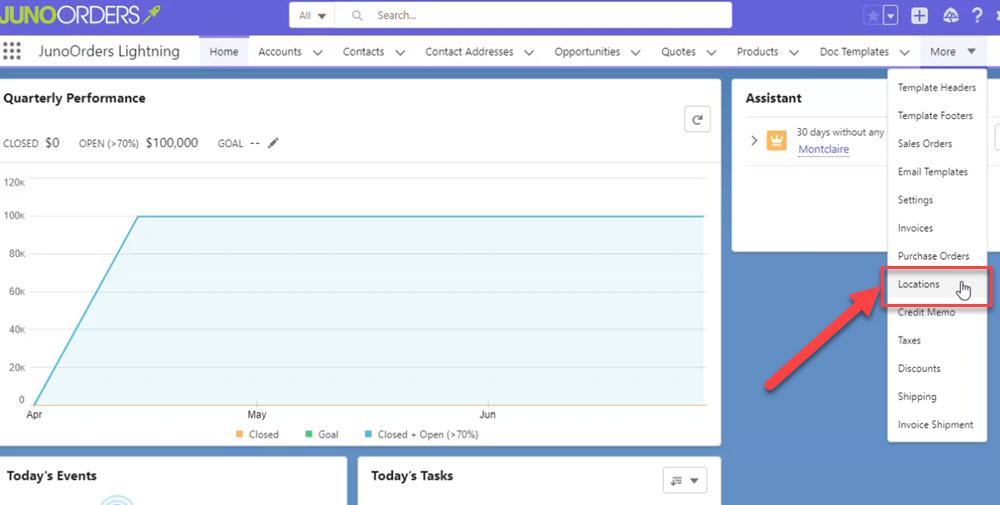
- Click on New.
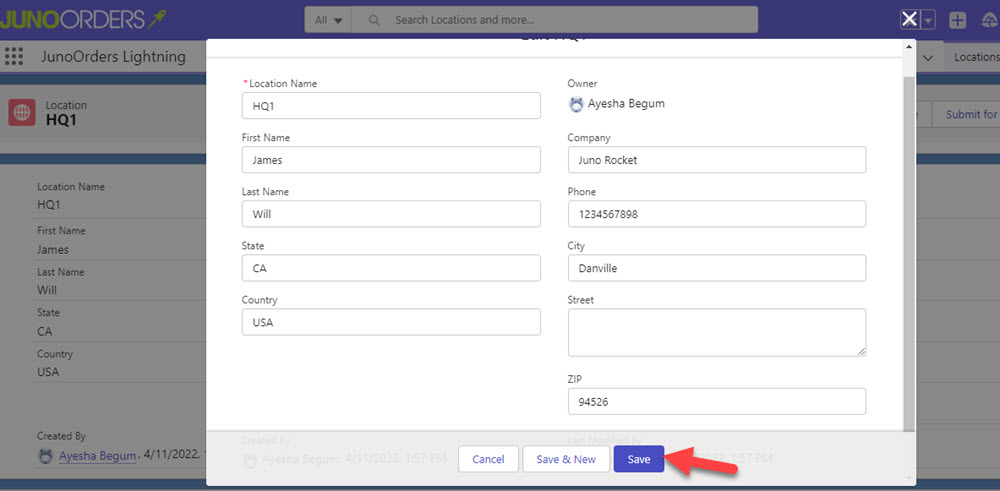
- Fill in all the required fields.
- Click Save.
Using Custom Object Numbers
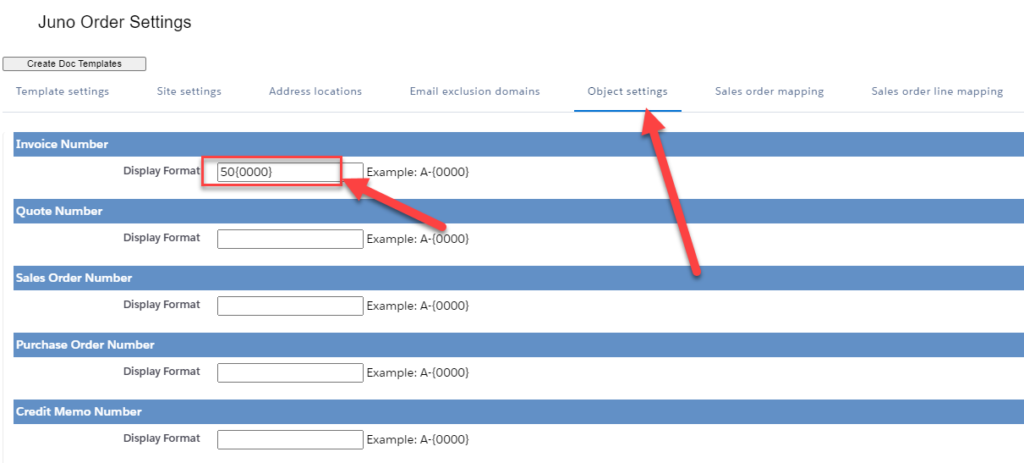
In this, we are going to see how we make changes in Juno Orders to set the Invoice Number to be 50{0000} on the Object Settings Tab. We also made a change to the PDF Invoice Template and changed to the Invoice_Number__c field name. Make sure you do the same for the email template.
In salesforce asains, an increment record number starting from “Zero”
If you want a custom number increment on its own then we had to add a custom field.
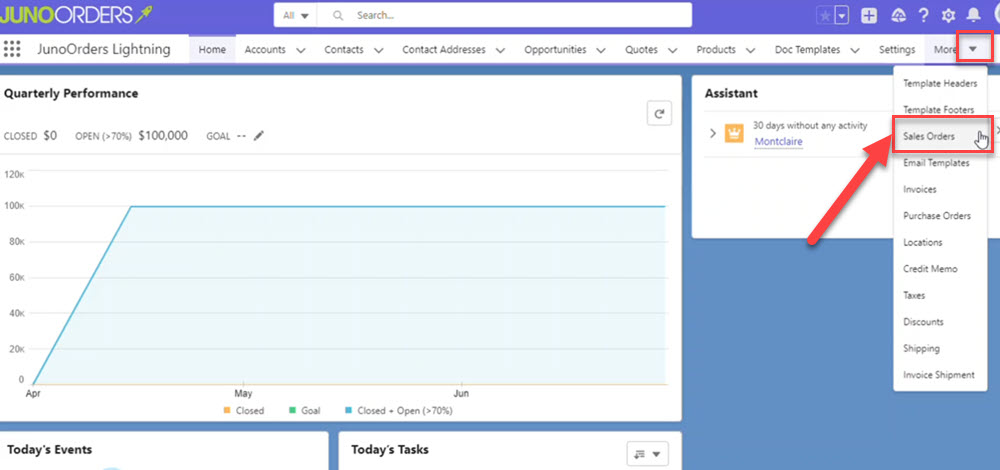
- Click on More.
- Click on Settings.
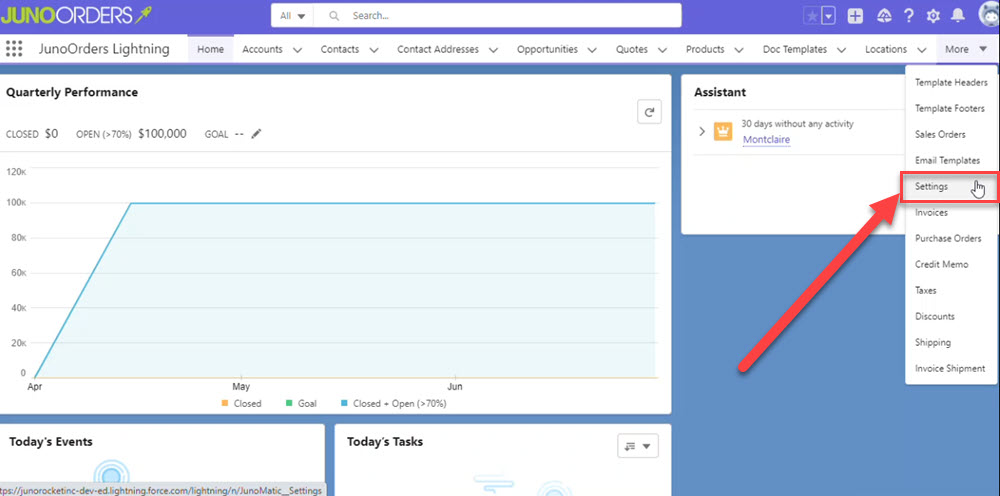
- In Junoorder setting Click on Object Settings.
- In Display Format deliver this layout 50{0000}.
- Click on Save.
- For Invoice Number Field click on the Edit object in Invoices Tab.
- Under the Page Layout makes sure that the Invoice Number Field is added to the Page Layout.
For Creating a sales order into invoices.
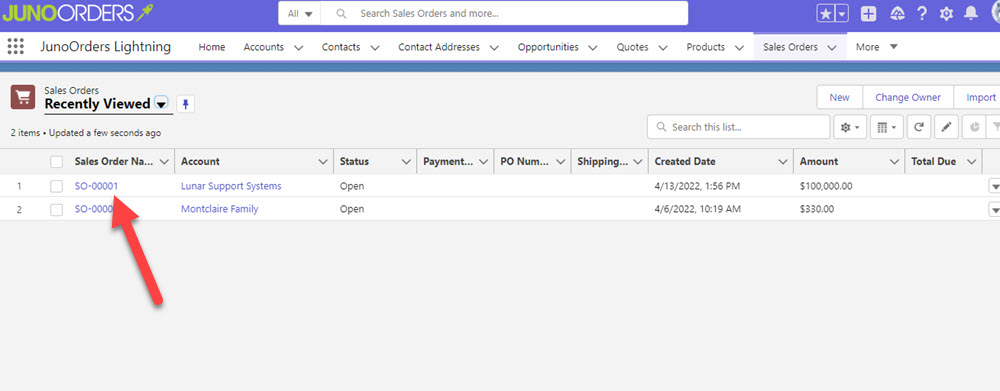
- Click on the Sales Order Tab.
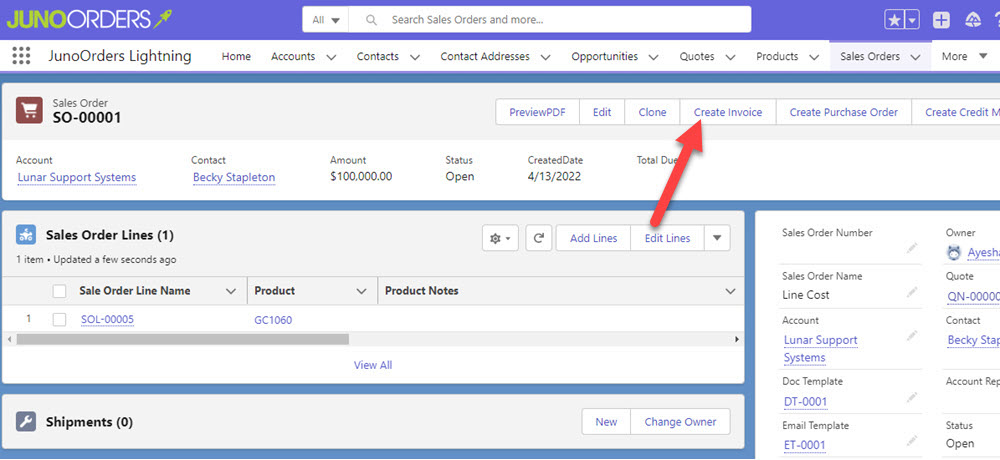
- Click on a Record.
- Click on Create Invoice.
- Click on Checkbox.
- Click on Create Invoice.
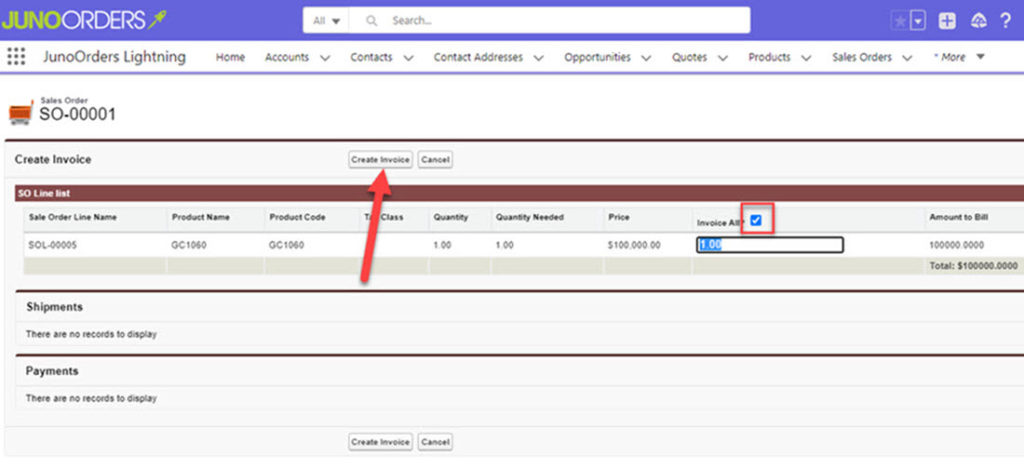
- Once an Invoice is created.
- If we want to display that Invoice number on PDF.
- Same activity is done as before, for checking the Invoice Number Field for Page Layout.

- We have to get the Invoice Number from the Field and Relationship.
- Search for Invoice Number field labels in Field and Relationship.
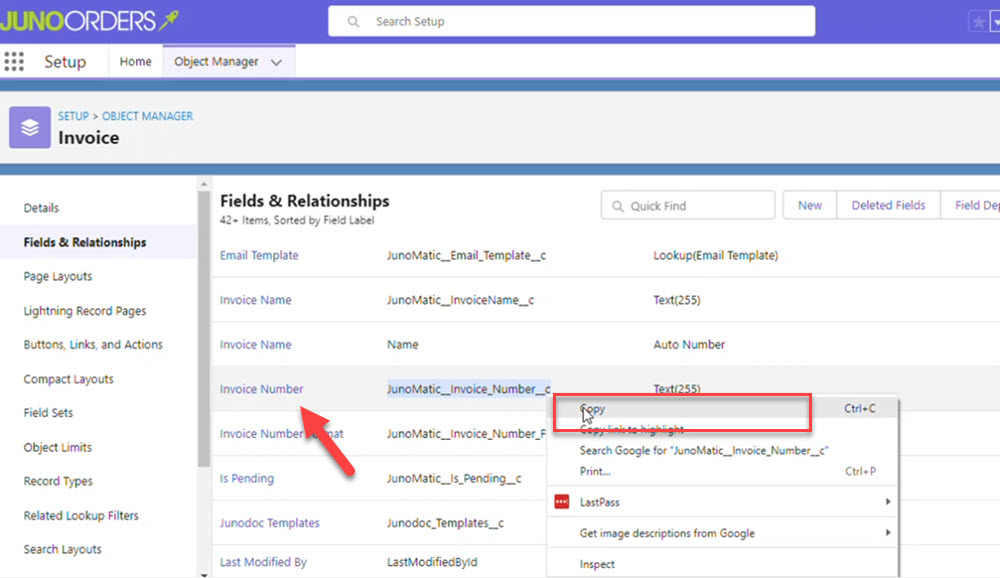
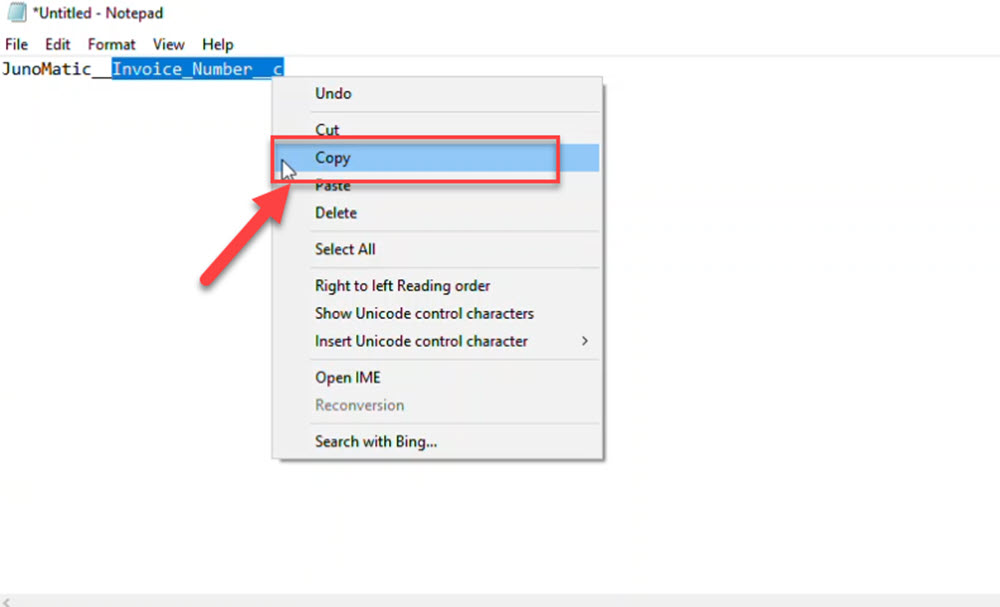
Copy the Field Name on the Text Doc.
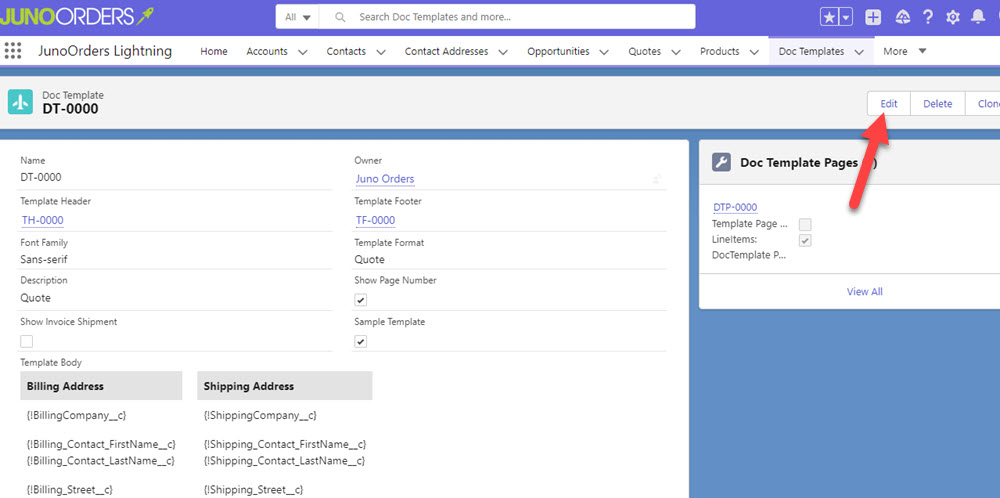
Click on the Template Header.
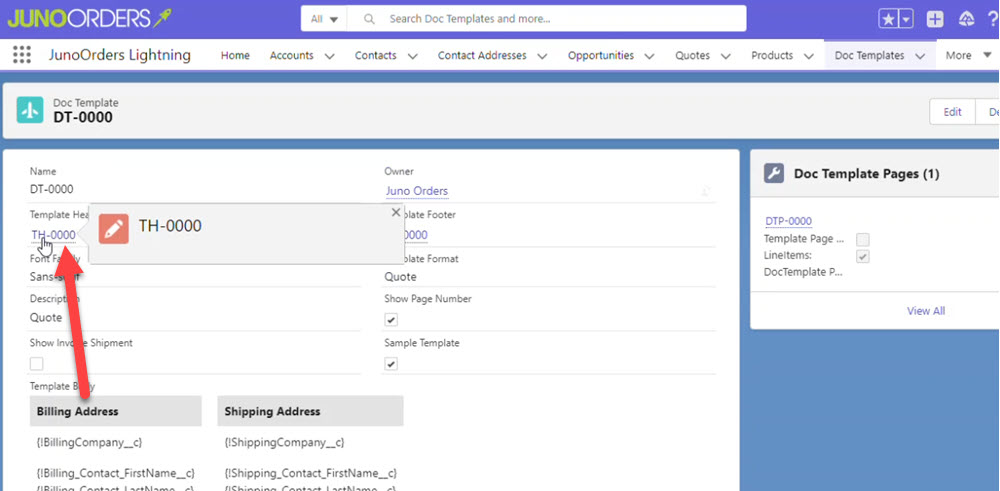
Edit the Doc Template in Invoice
- Invoice no replace {name} with the text copied in text doc Inovoice_Number_c.
- Click on Save.
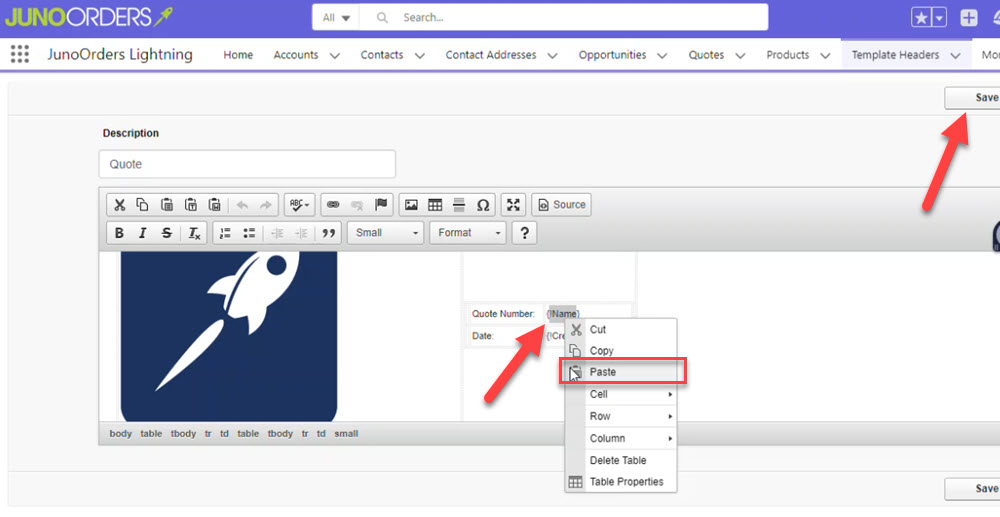
Here You can see the Quote number is changed.

- Click on Preview Pdf in Invoices Tab to check the invoice number.
- Do the Same process for adjusting the Email Template.