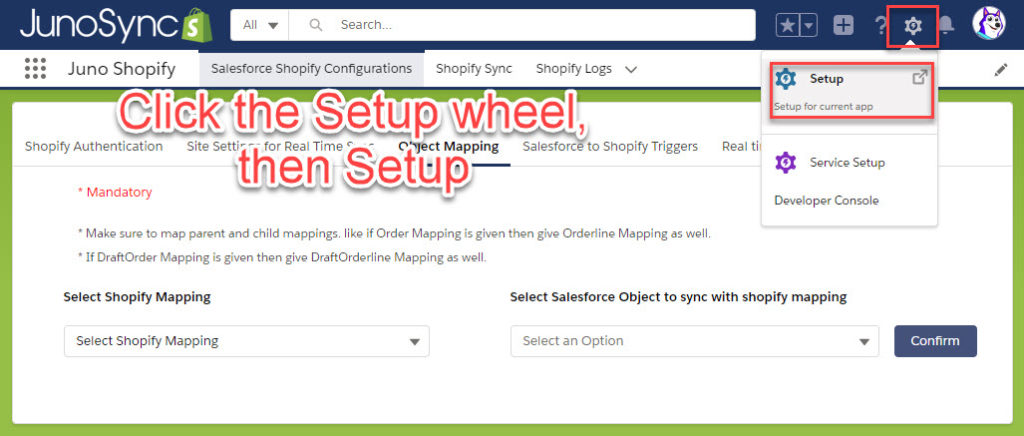
Initial Setup
Click the Setup Wheel in the upper right corner, then click Setup.
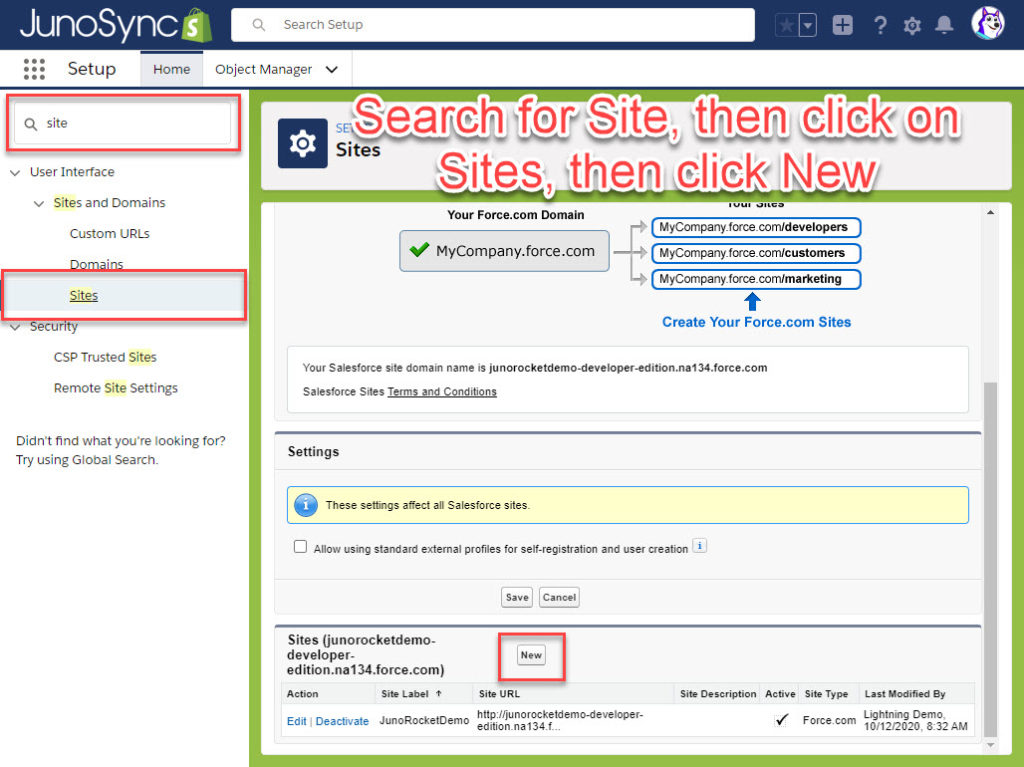
Create a New Site
In the search box, type in “site”. You will see “Sites” highlighted in yellow. Click on Sites. Near the center of the page you will see a button “New”. Click the New button.
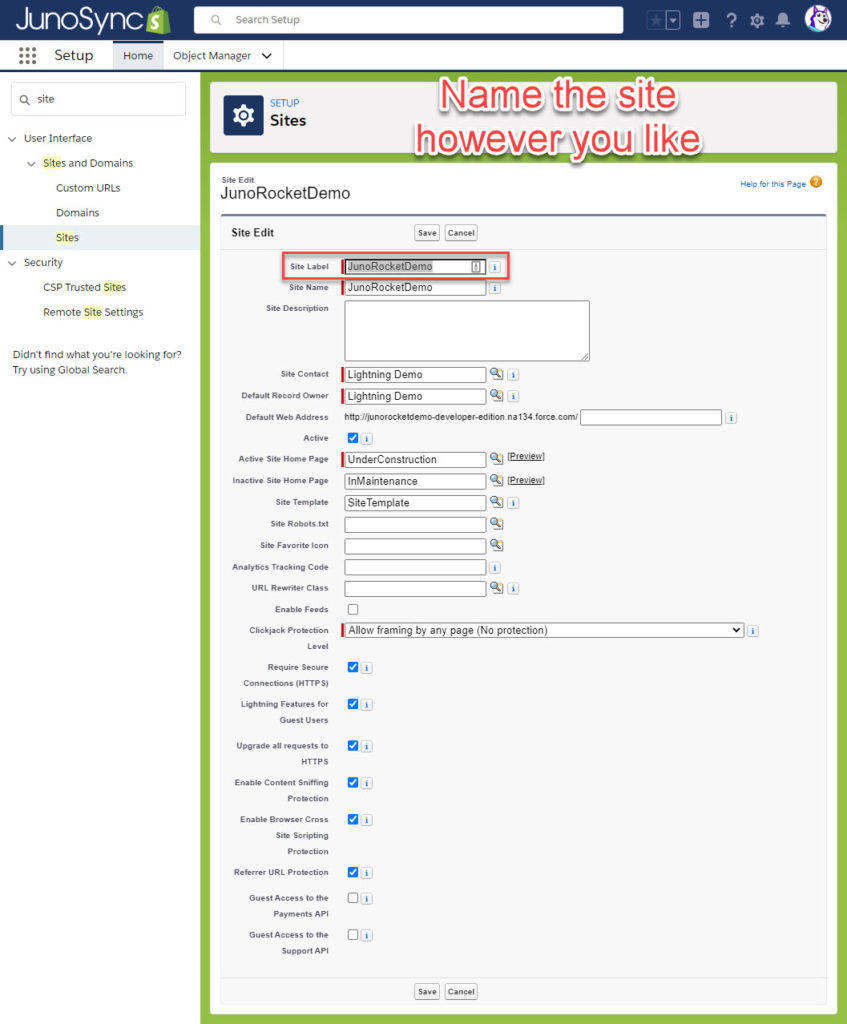
Add Site Settings
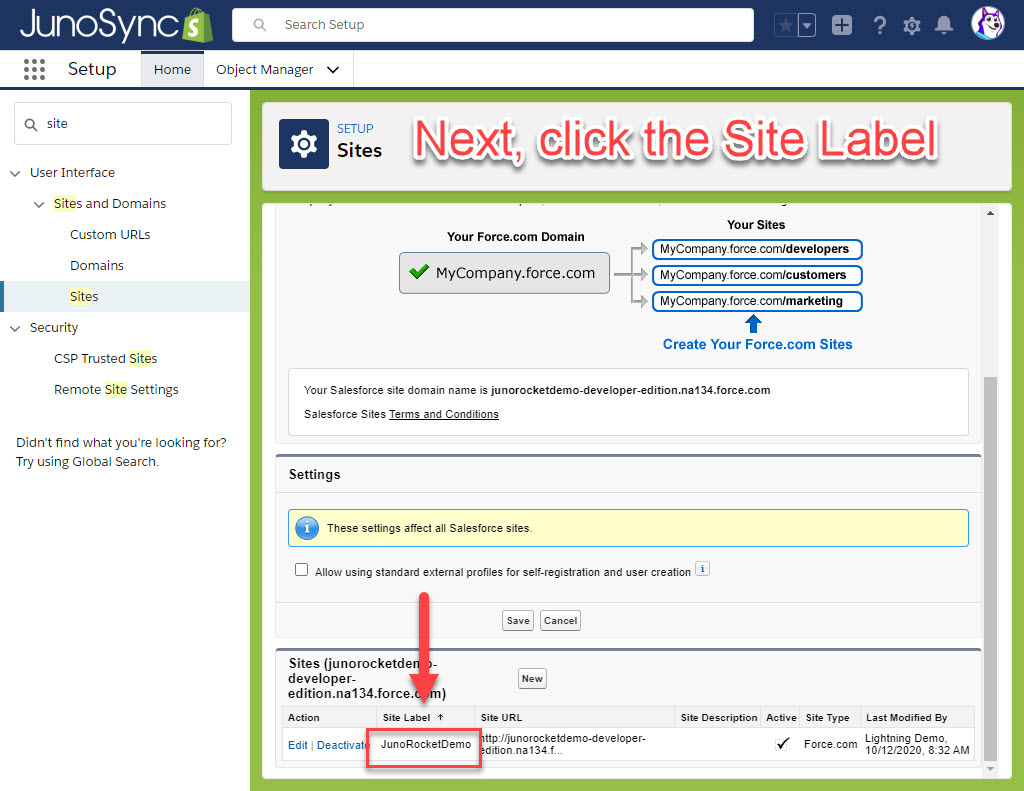
For Site Label, you can name your site whatever you want. For this demo, you can see we named the site JunoRocketDemo. Confirm the rest of the settings like like this screenshot.
Update Site Details
To view the Site Details, click on the Site Label of the Site you just created.
Click on the Public Access Settings Button now.

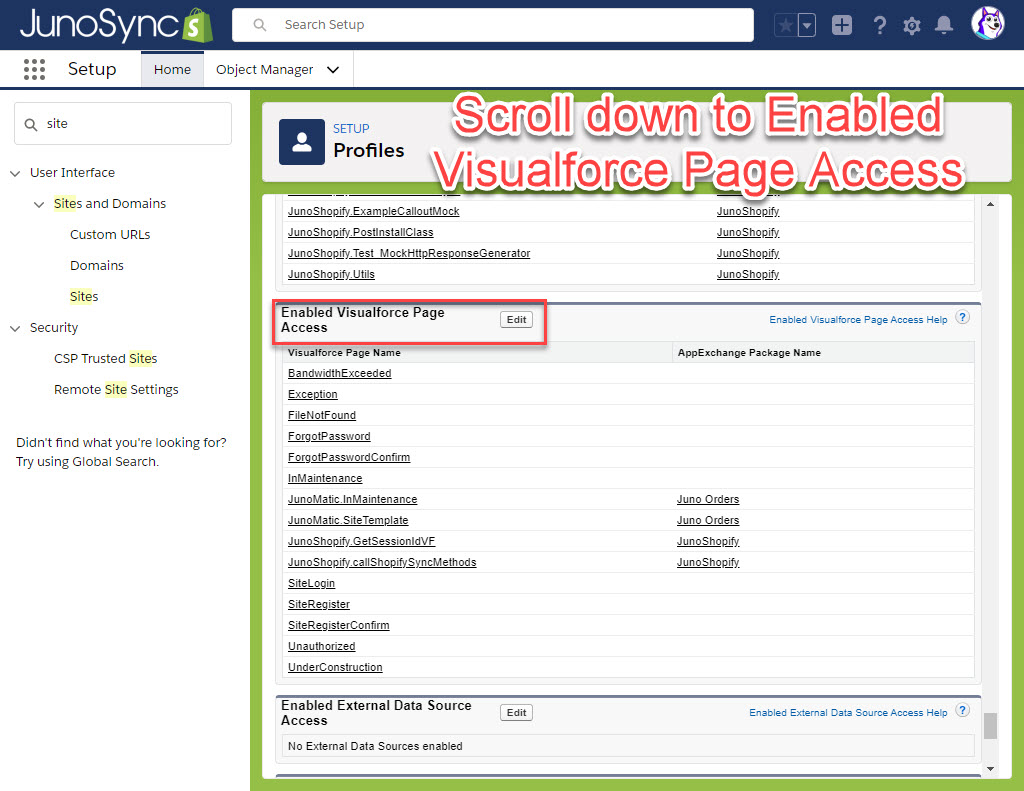
Scroll down to the section Enabled Visualforce Page Access and select the Edit button. Hint: It’s near the bottom.
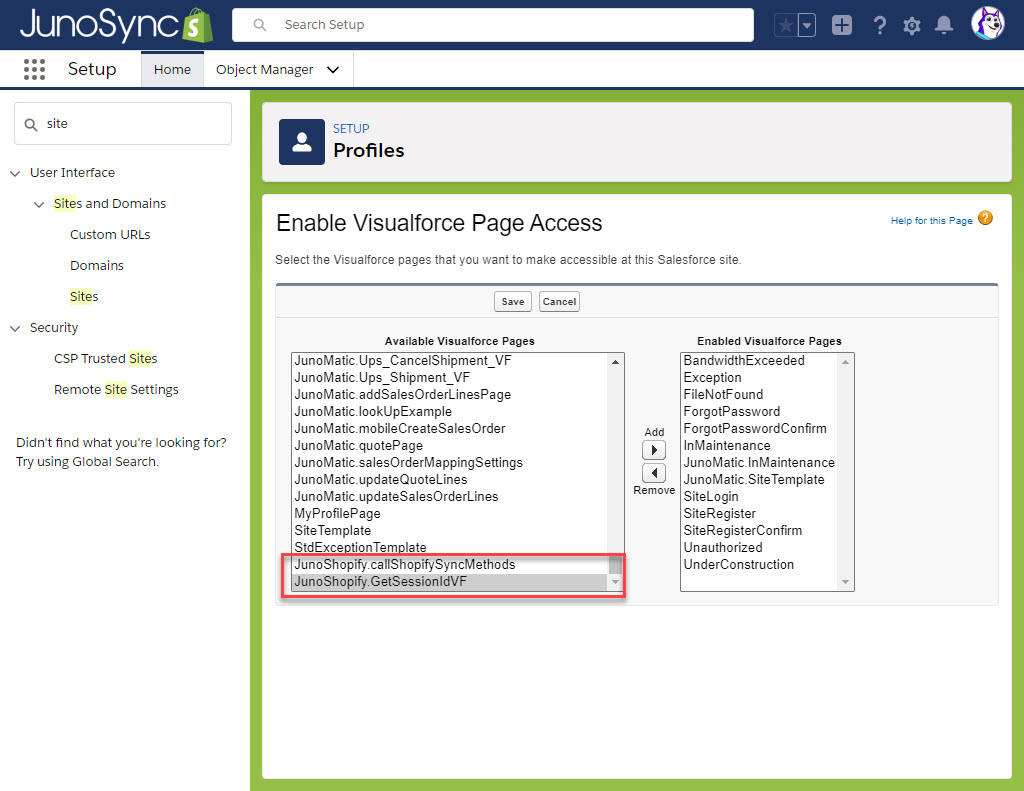
Add the following two Visualforce Pages to the list on the right
- JunoShopify.callShopifySyncMethods
- JunoShopify.GetSessionIdVF
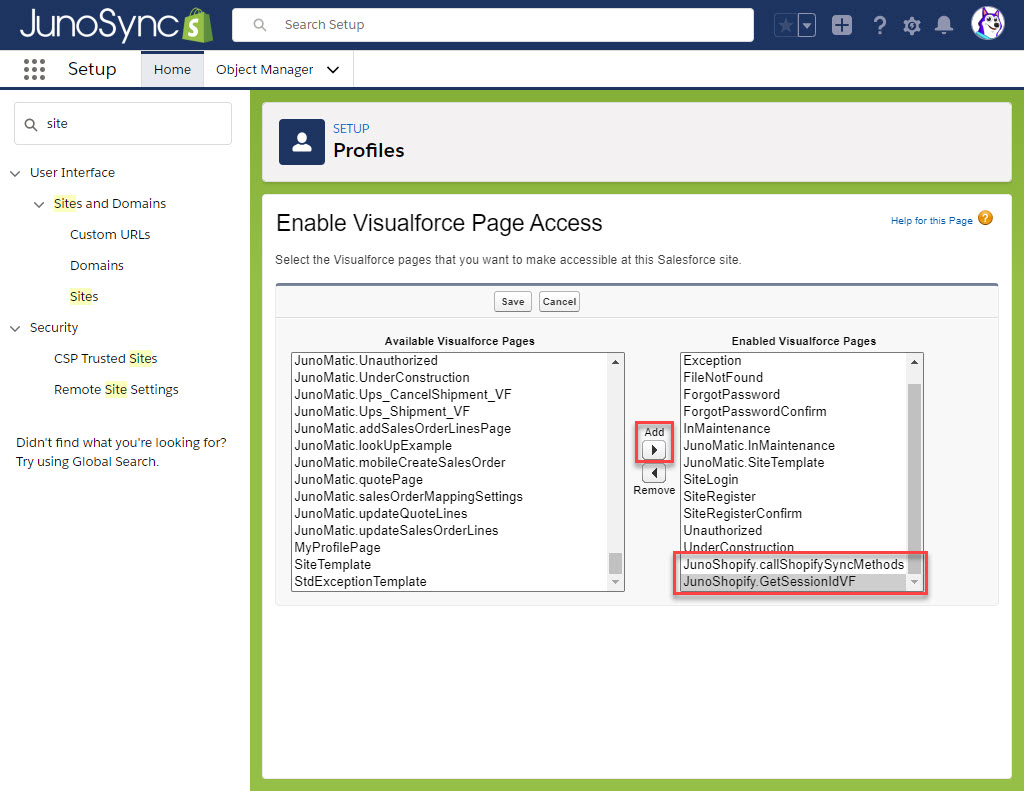
When you add them to the right side, they will look like the following. Hit the Save button once these two are added.
Staying in the same Profile, scroll slightly up to the Enabled Apex Class Access. Hit Edit.
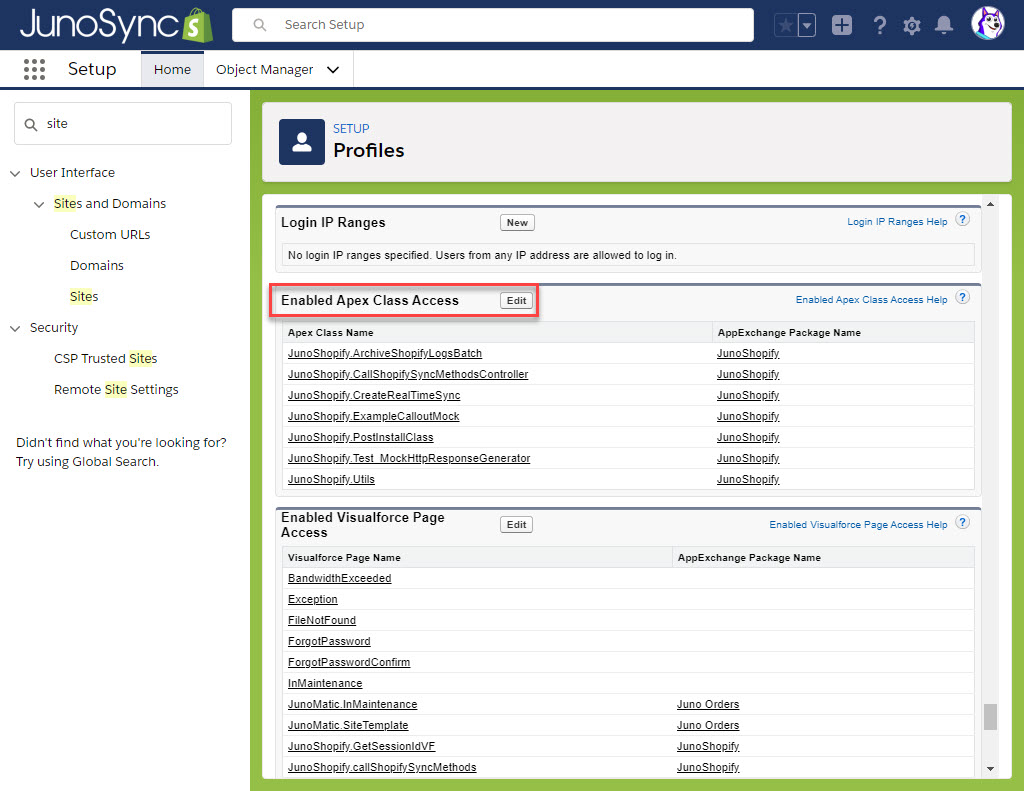
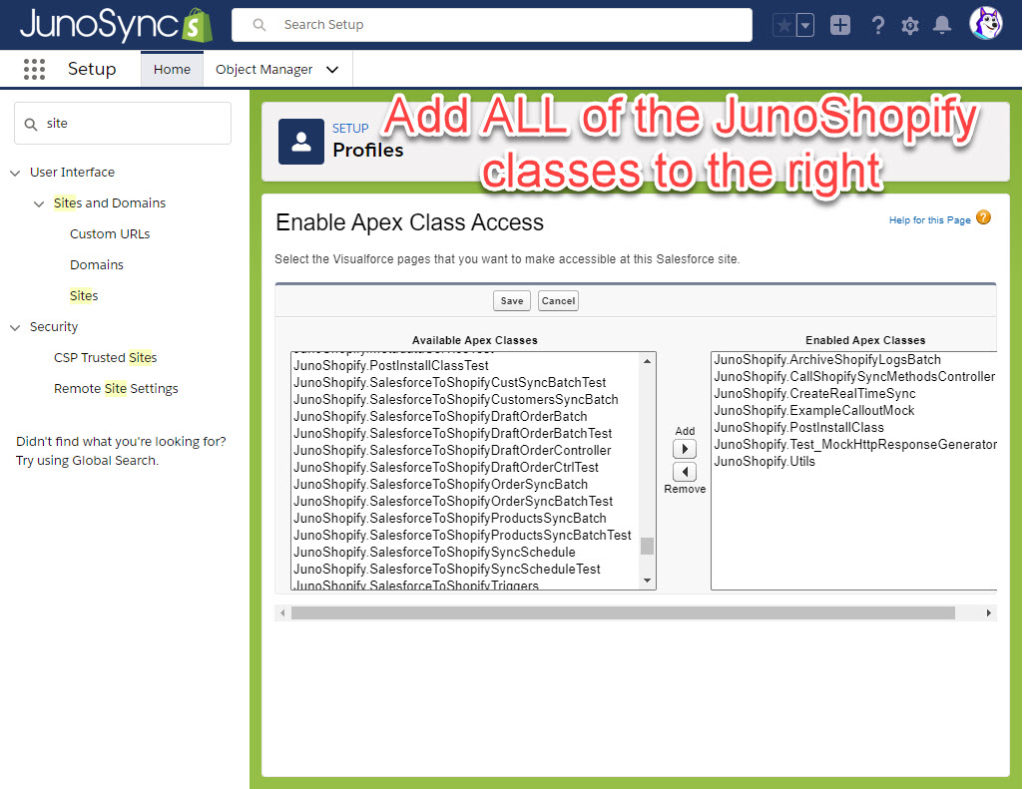
Add ALL of the JunoShopify classes to the right side. Then hit the Save button.
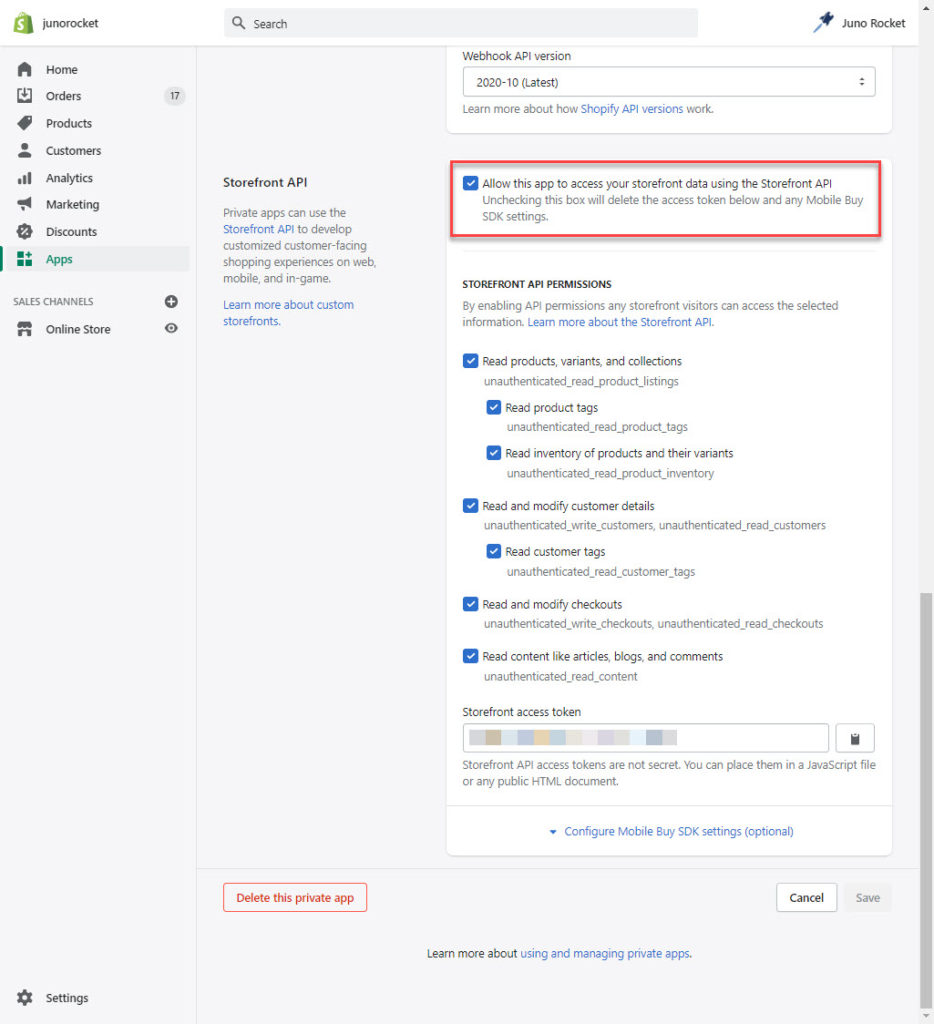
Shopify API Connection
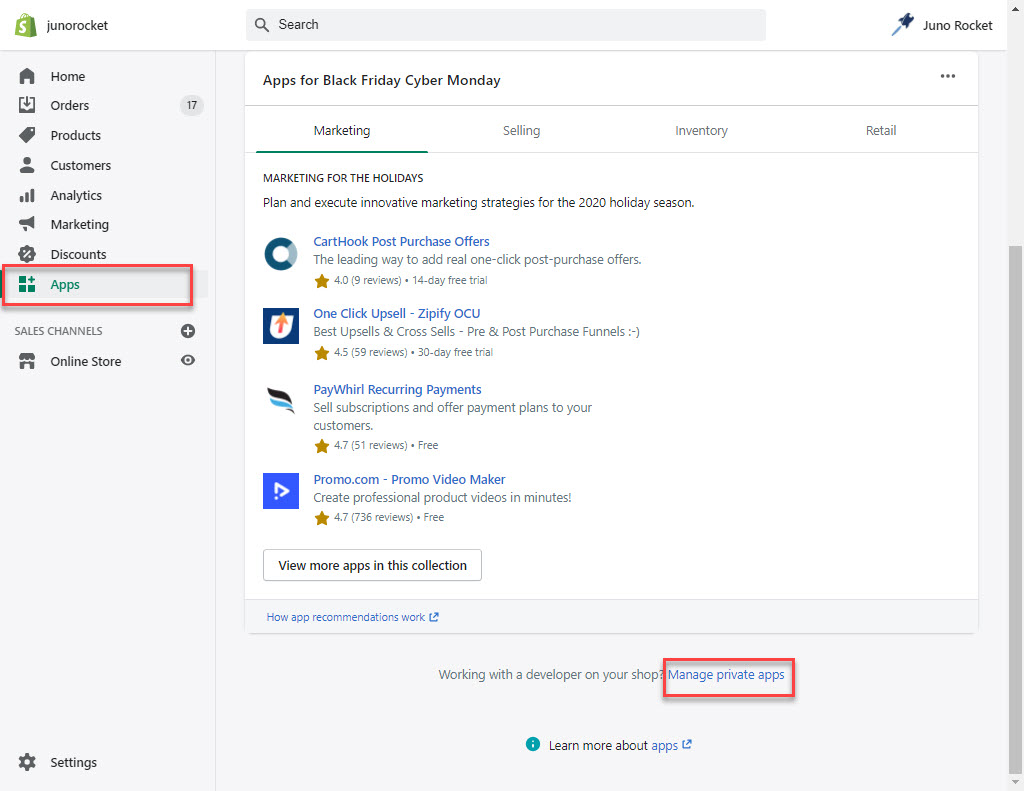
Log into your Shopify admin panel. Select Apps from the navigation panel on the left. Scroll all the way down until you see Manage private apps link at the bottom.
Select the Create new private app button in the upper right corner.

You may name the app anything you want. In this example, we named the app junosync. Click on the hyperlink in the center of the screen to view and activate additional permissions for the app.
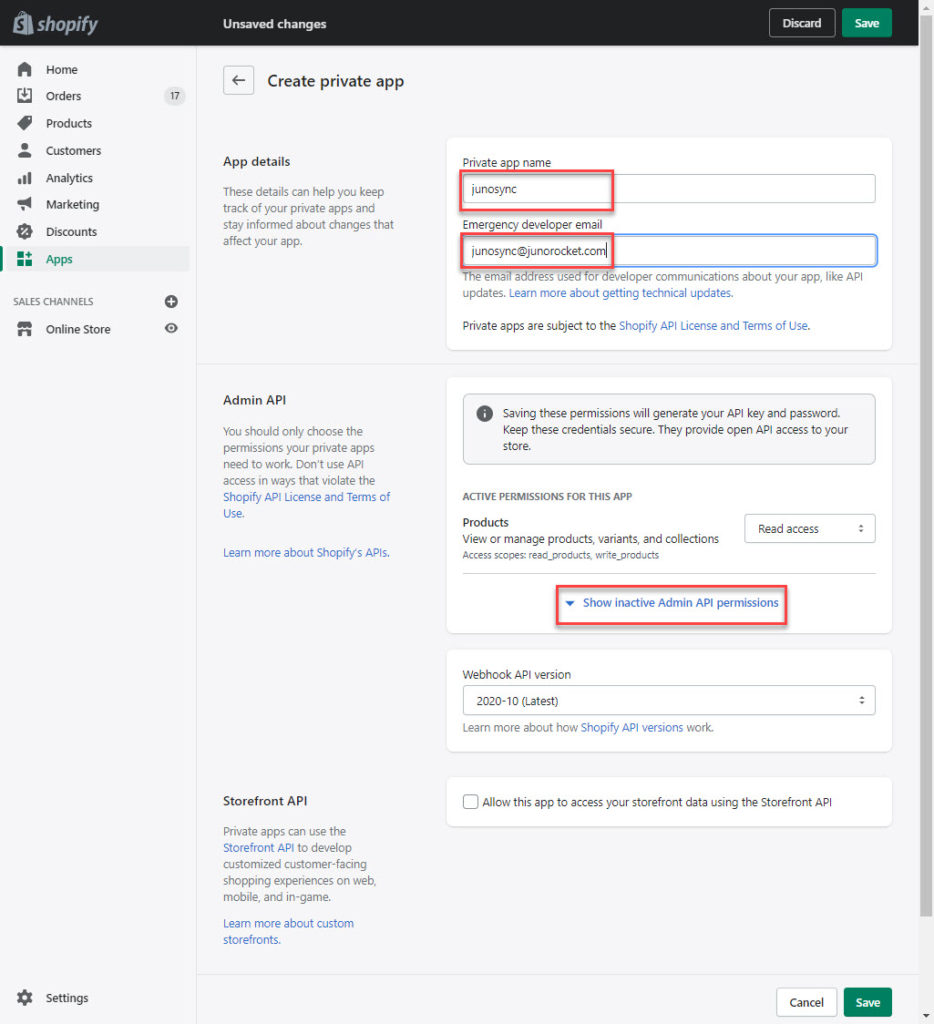
Set the following API permissions to Read and write.
- Customers
- Draft Orders
- Orders
- Products
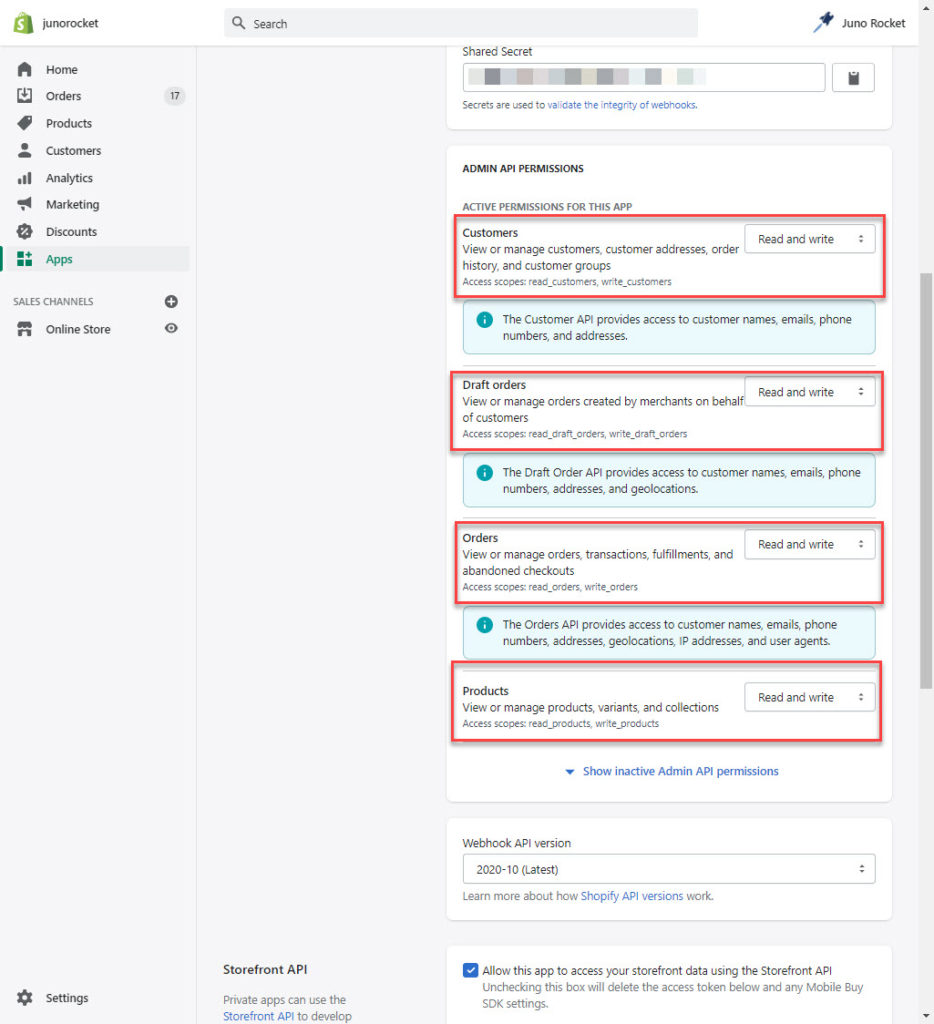
Also, check the box to Allow this app to access your storefront data.