Once you have established a connection to QuickBooks through the Installation process, you can review the Setup pages here and make necessary adjustments before you start synchronizing records.
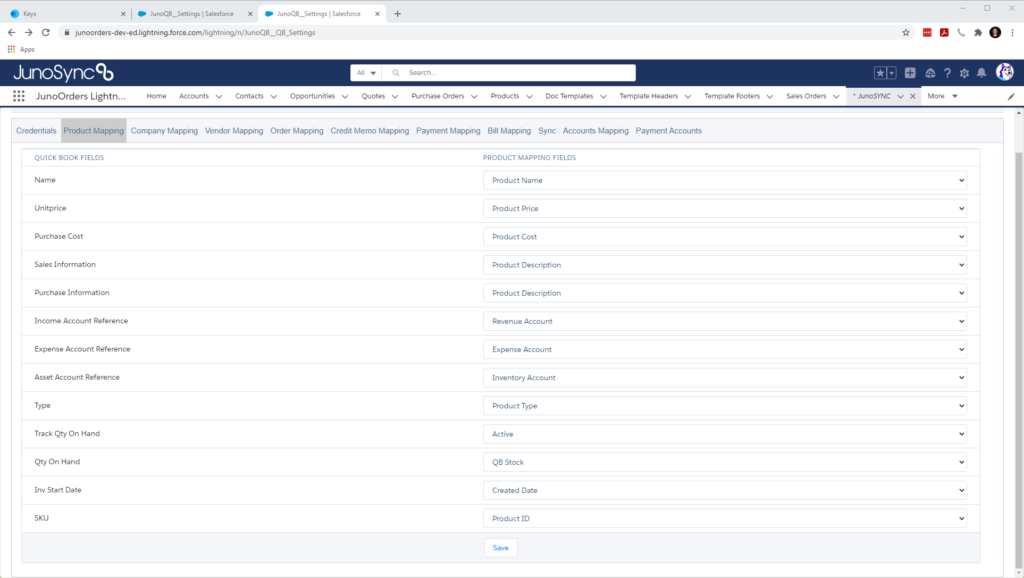
Product Mapping
As you can see from the screenshot below, the Product Mapping is already done for you. Take a moment to review these settings before moving on.
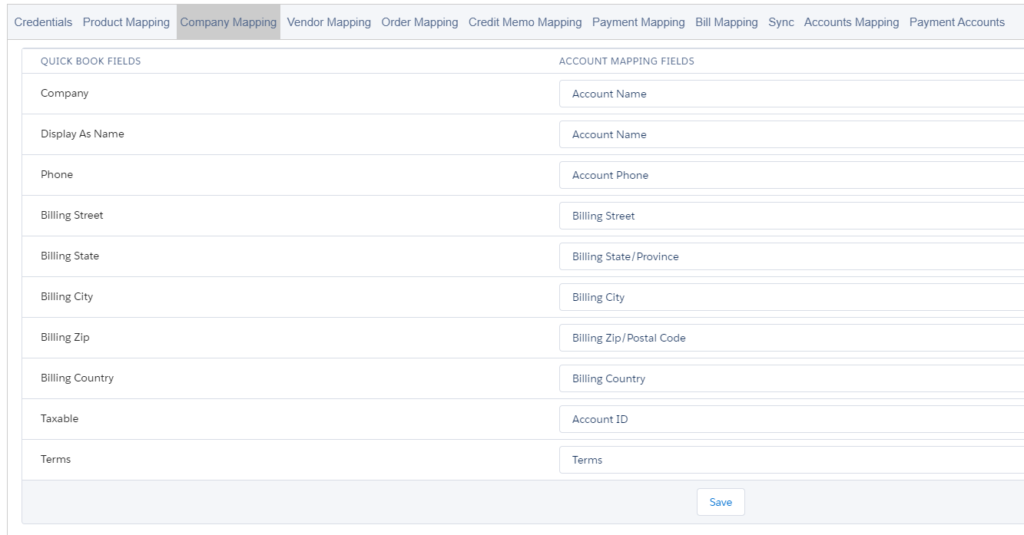
Company Mapping
The terms feature is relatively new to Juno Orders, so if you’ve been a Juno Orders user for any length of time, you may want to make use of this new feature.
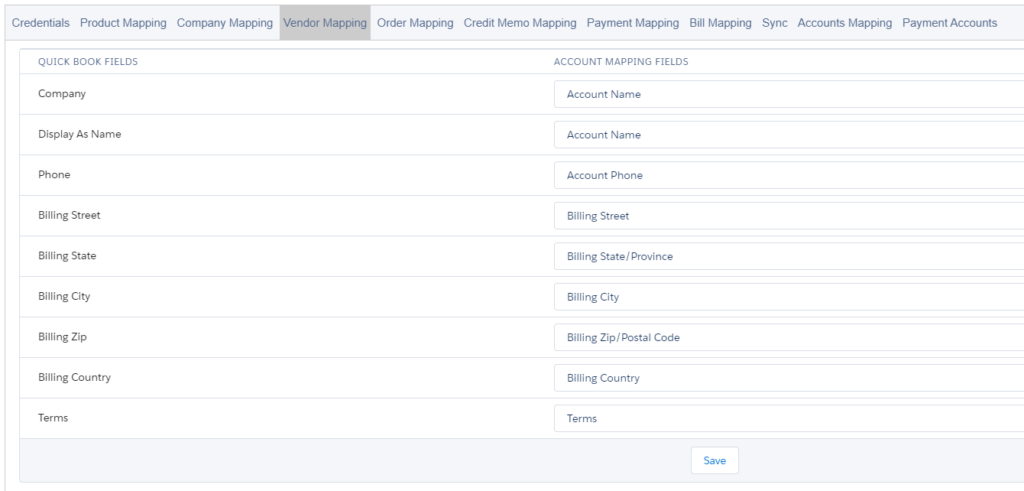
Vendor Mapping
Similar to Company Mapping, the terms feature is also new to Juno Orders.
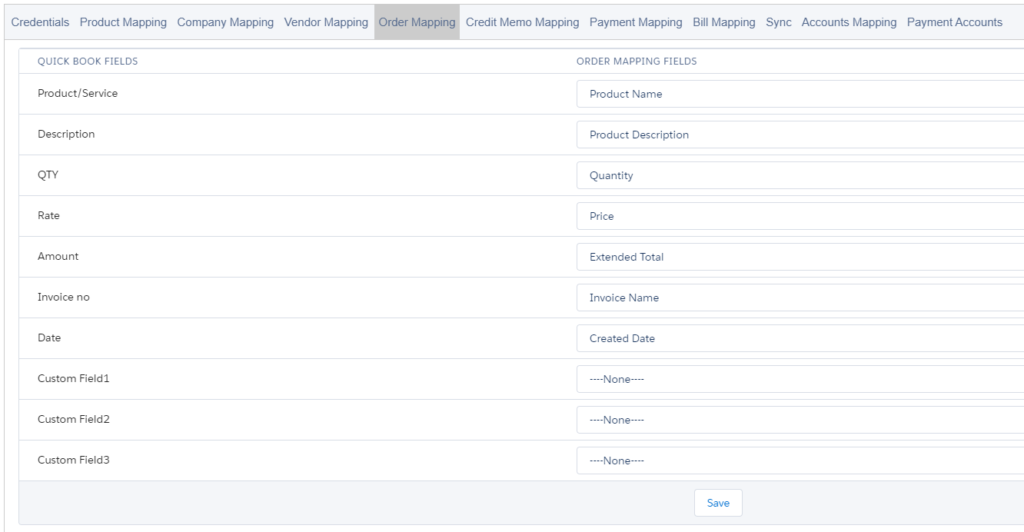
Order Mapping
Order mapping has already been completed for you as well. In addition, there are three available custom fields. Juno Orders Invoices has a number of fields you may choose to map here including PO Number, Project and Invoice Name.
This mapping is used between the Juno Orders Salesforce Invoice and the QuickBooks Online Customer Invoice.
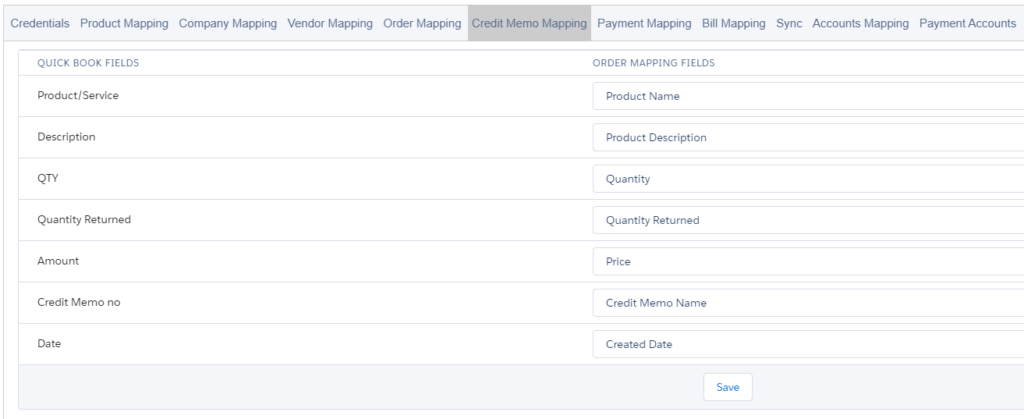
Credit Memo Mapping
Depending on your business, you may offer customers Credit Memos for returned product and or services credit. Either way, the Credit Memo mapping serves to synchronize between the Juno Orders Salesforce Credit Memo and the QuickBooks Online Credit Memo.
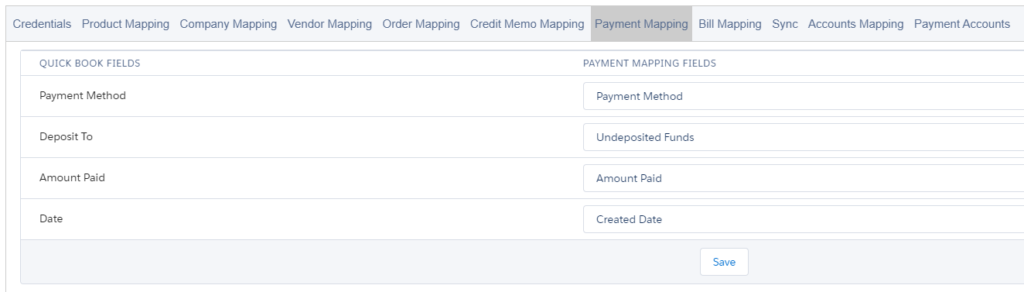
Payment Mapping
There are four important items to consider on the page.
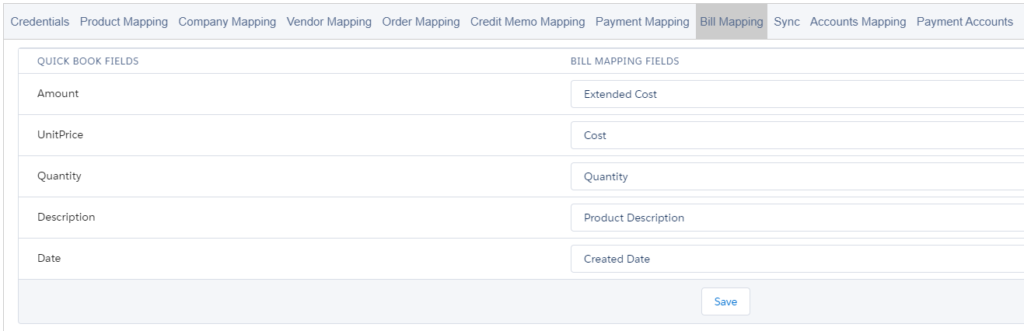
Bill Mapping
The Bill Mapping is the mapping between the Salesforce Purchase Order and the QuickBooks Vendor Bill. We do not create Purchase Orders in QuickBooks, as it would still require you to create a Bill against that PO. So instead, we save you time by creating the Bill directly.
In Juno Orders, when you “receive” a Vendor Invoice, you can enter that Vendor Invoice number into the Vendor Reference field on the Purchase Order layout. This value will be come the Bill Number in QuickBooks.
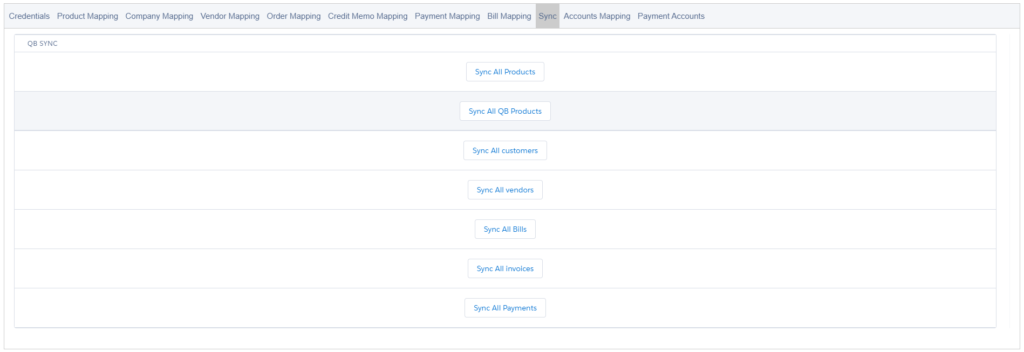
Sync
To initiate an immediate sync of any of the listed objects, use this screen. It would be wise to verify the sync is working properly for each object prior to executing this bulk sync. You want to fully understand and verify where each object is mapped and confirm that is exactly what you want before opting for these.
It’s never a bad idea to manually sync a dozen Products, Purchase Orders and Invoices, then have your bookkeeper look everything over in QuickBooks before proceeding.
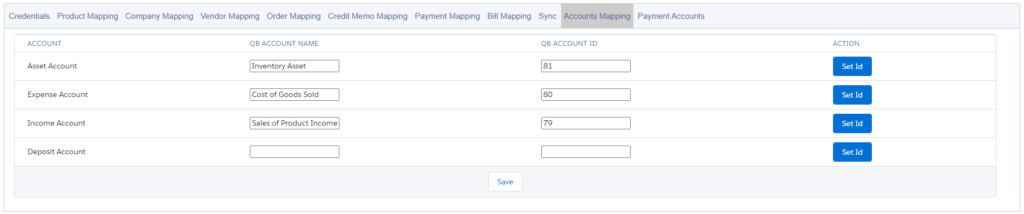
Accounts Mapping
The four mappings on this tab determine which accounts are bein utilized by default for Products.
Asset Account – Use the “Set ID” button to select the correct Inventory Asset Account for your products. The “QB Account Name” Column has no effect. It’s simply a place to add any notes regarding the mapping.
Expense Account – For product businesses, the Cost of Goods Sold account is the most common option.
Income Account – This is typically the “Sales of Product Income” for product based businesses, although “Service Income” would be appropriate for service businesses.
Deposit Account – This is the default deposit account for funds coming in.
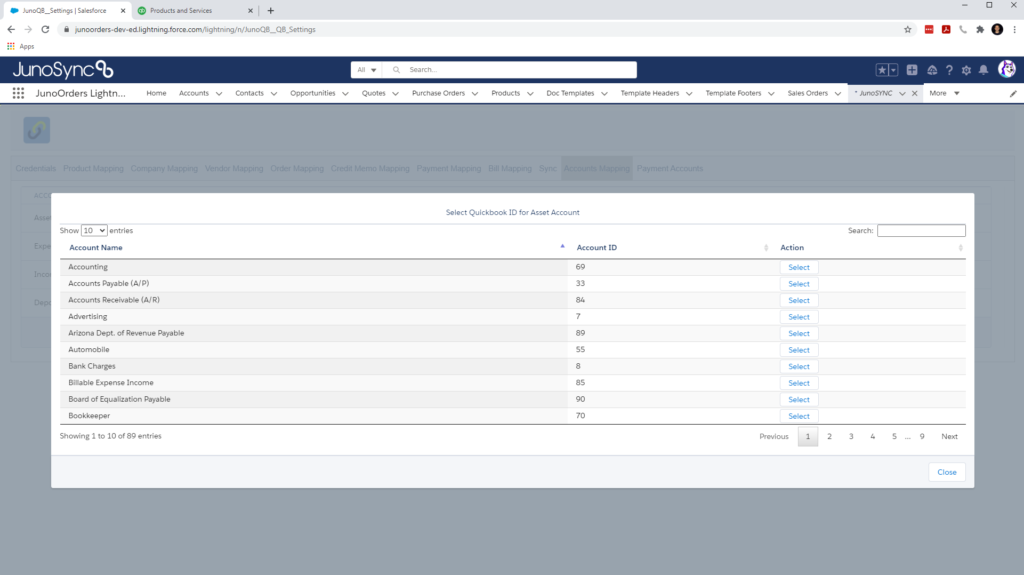
Below is typical of what you would see when using the “Set ID” button for Accounts Mapping.
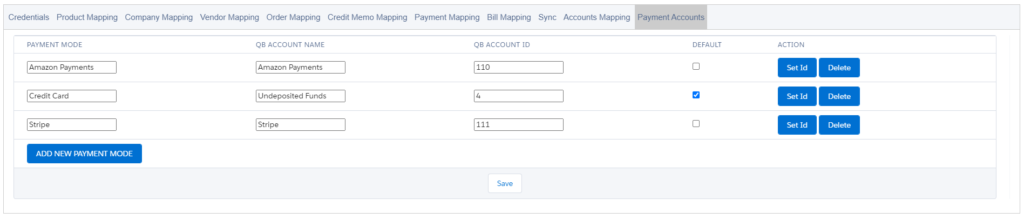
Payment Accounts
Similar to Accounts Mapping (above), Payment Accounts feature a “Set ID” Lookup button and a note column “QB Account Name”. You can also manually set the QB Account ID if needed.
The “Payment Mode” will determine which account the funds will be sent to in QuickBooks based on the “Payment Method” field on the Sales Order / Invoice in Salesforce.
As an example, if the word “Stripe” is populated in the Payment Method field on the Sales Order / Invoice, this will cause the sync tool to place these funds in the Stripe defined account.
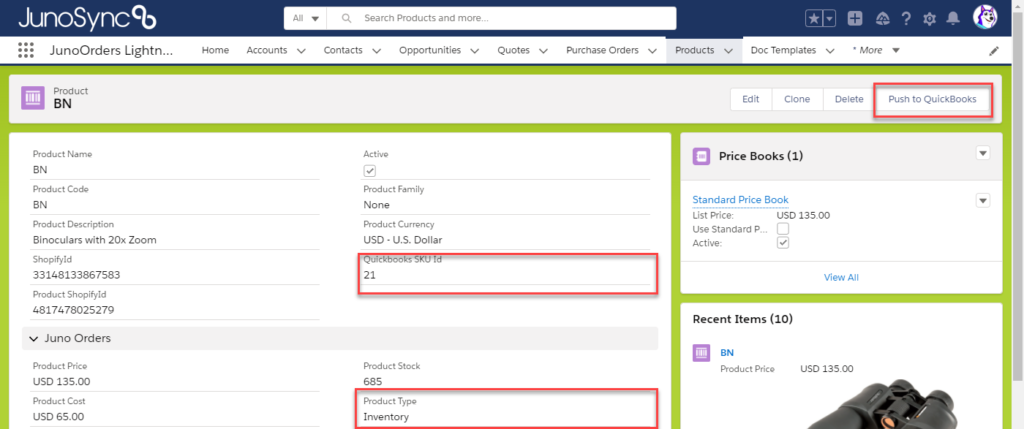
Product Setup
On the Product Layout, you’ll need a couple of new fields and a button. You’ll want to add the fields “QuickBooks SKU ID and Product Type”. Since you are likely already a Juno Orders user, the Product Type should already be added to your layout.
You will also want to add the button “Push to QuickBooks”. See below.
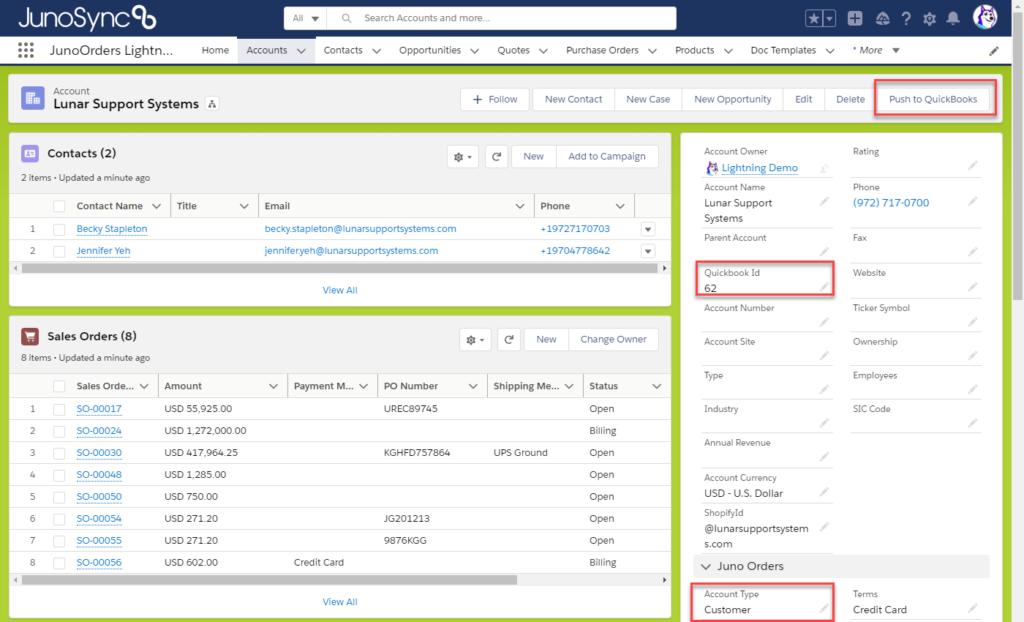
Account Setup
On the Account Layout, you’ll need two fields and one button. You’ll want the “QuickBooks ID and the Account Type” fields on the layout. In addition, you want the “Push to QuickBooks” button.
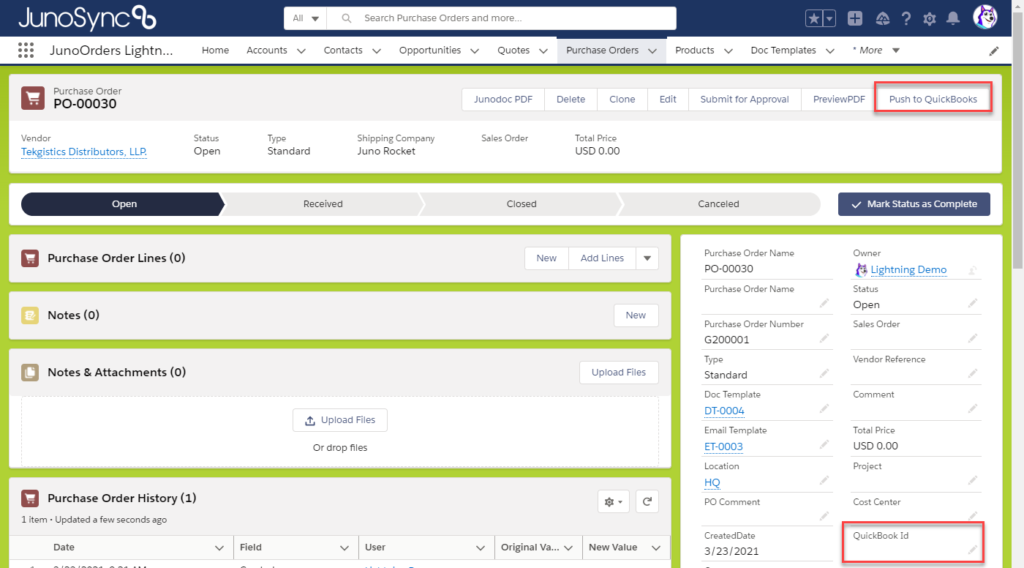
Purchase Order Setup
On the Purchase Order layout, you’ll want the “QuickBooks ID” field on the layout. In addition, you want the “Push to QuickBooks” button.
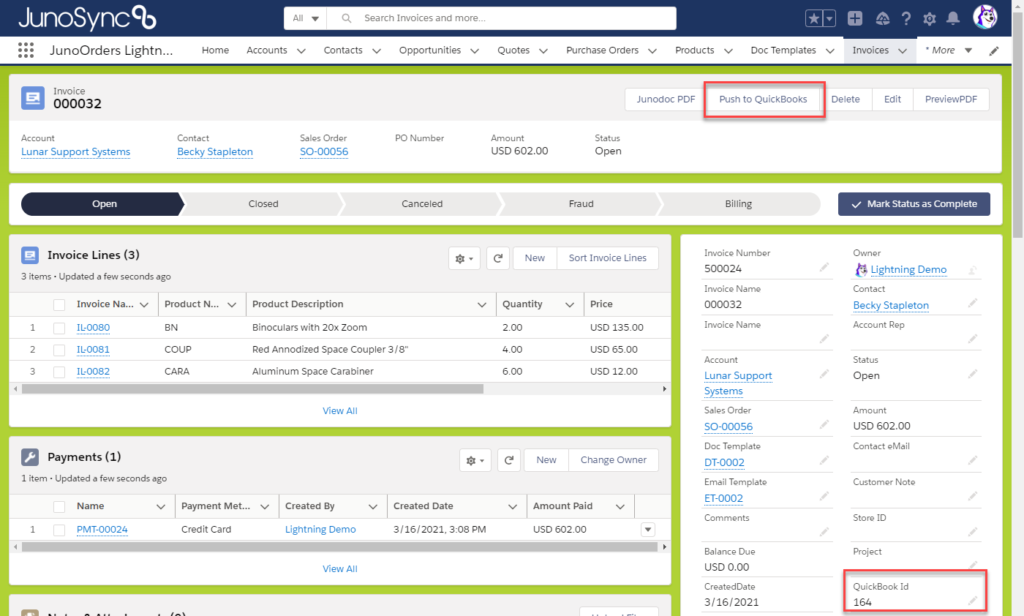
Invoice Setup
On the Invoice layout, you’ll want the “QuickBooks ID” field on the layout. In addition, you want the “Push to QuickBooks” button.